
Learn how to make new workflows in CanopwWS
Sometimes, procedures can involve a lot of migrating between applications, tabs, and other softwares. Canopy includes a workflow feature that simplifies processes. If used the right way, it cuts down on paperwork, acknowledgements, and improves office effeciency.
In this example, we are going to create a custom workflow in our test site. For this company, new hires recieve a work laptop within thier first 10 days of employment. The workflow will send a message to the head of IT to acquire and set up a new hire's computer.
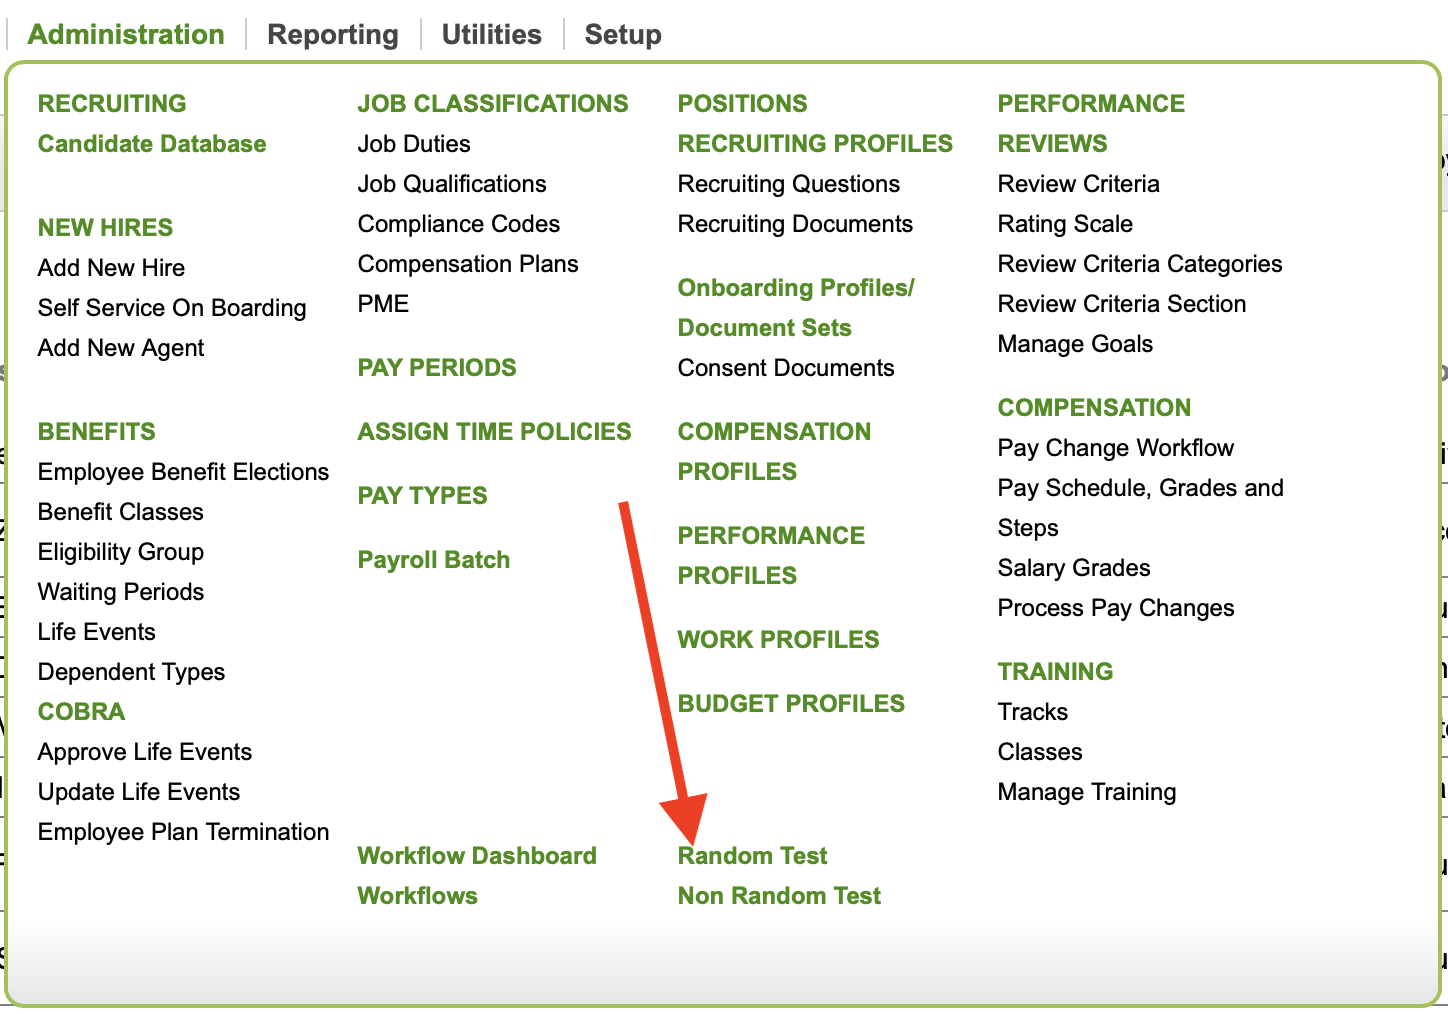
First, we will need to go to the workflow dashboard. The link can be found in the Administration tab.
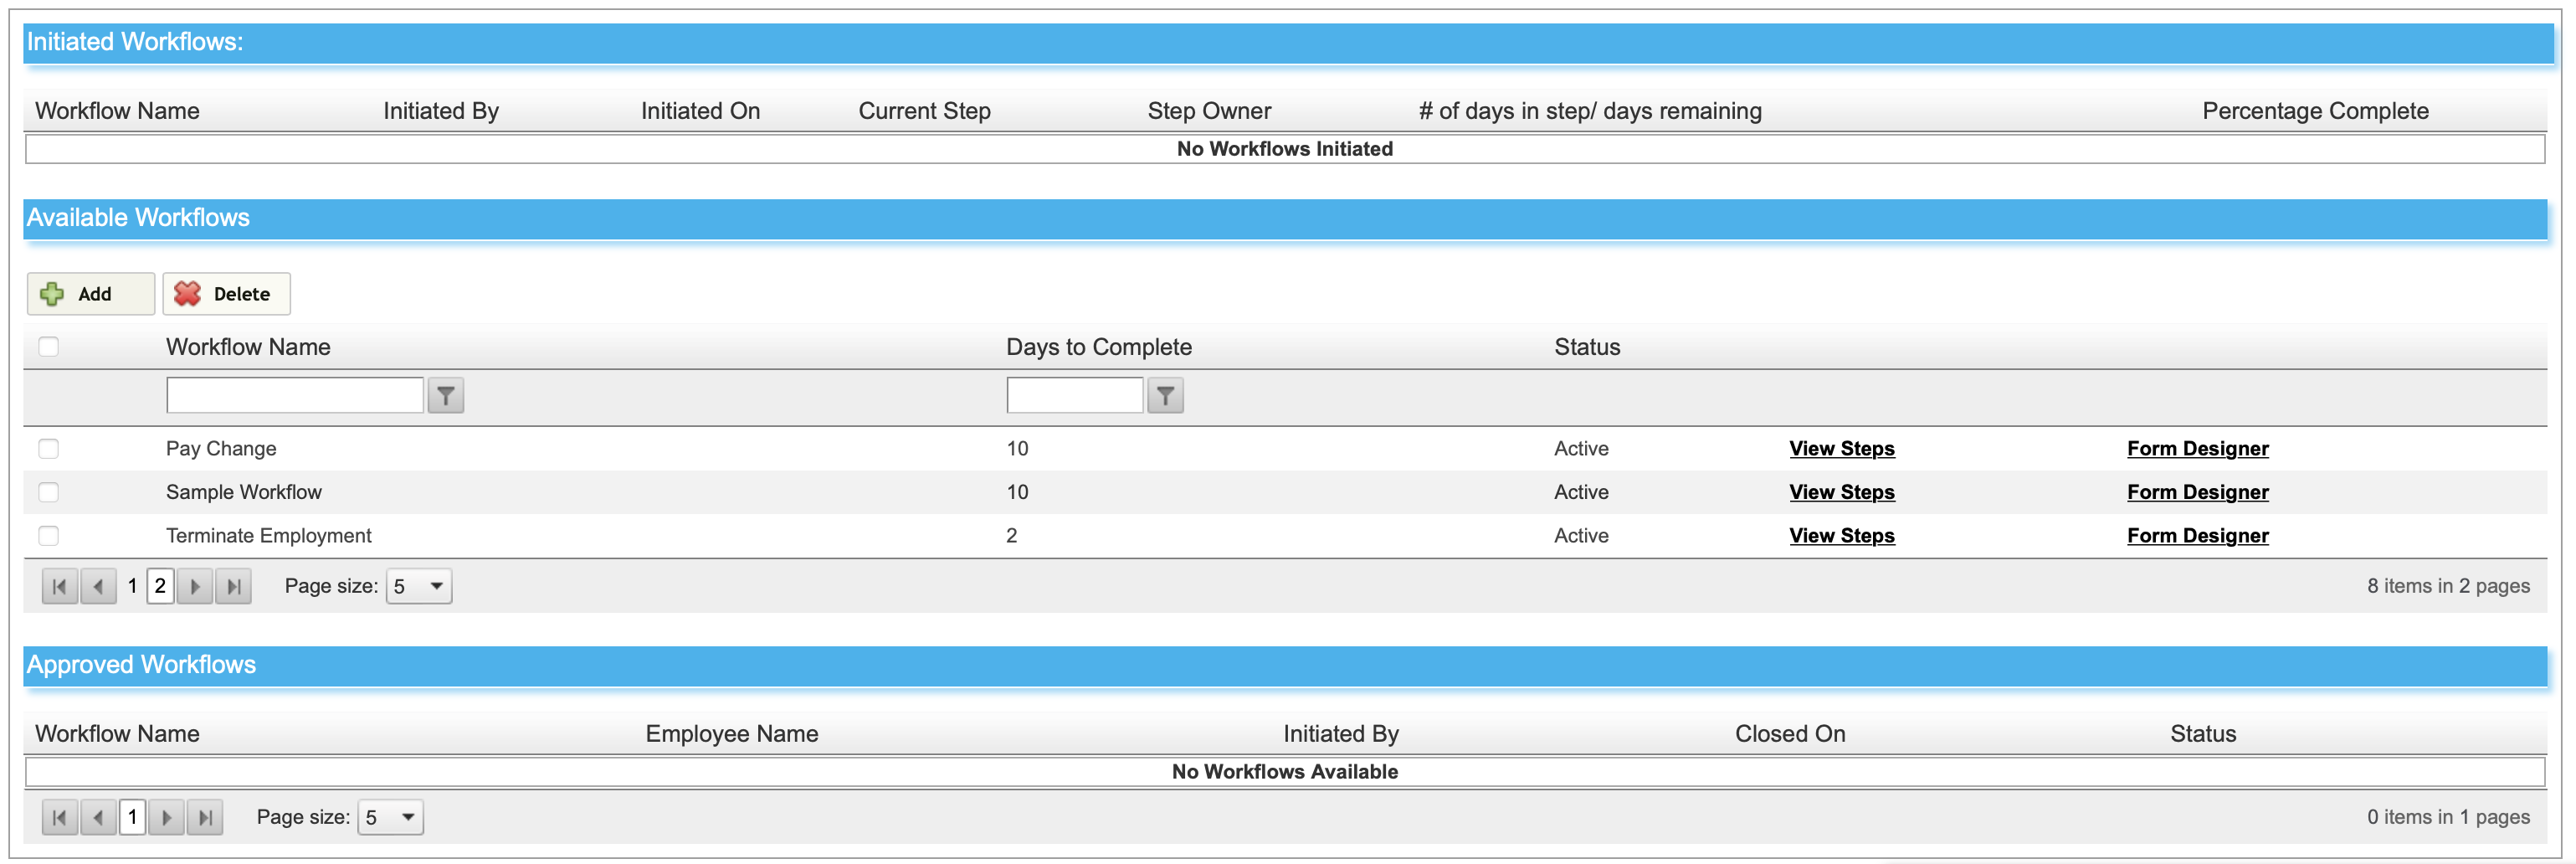
The dashboard show all available, initiated, and approved workflows in your account. You can view the steps and forms for each of these workflows using their links (more on those later) and delete any unneeded workflows. Let's make one.
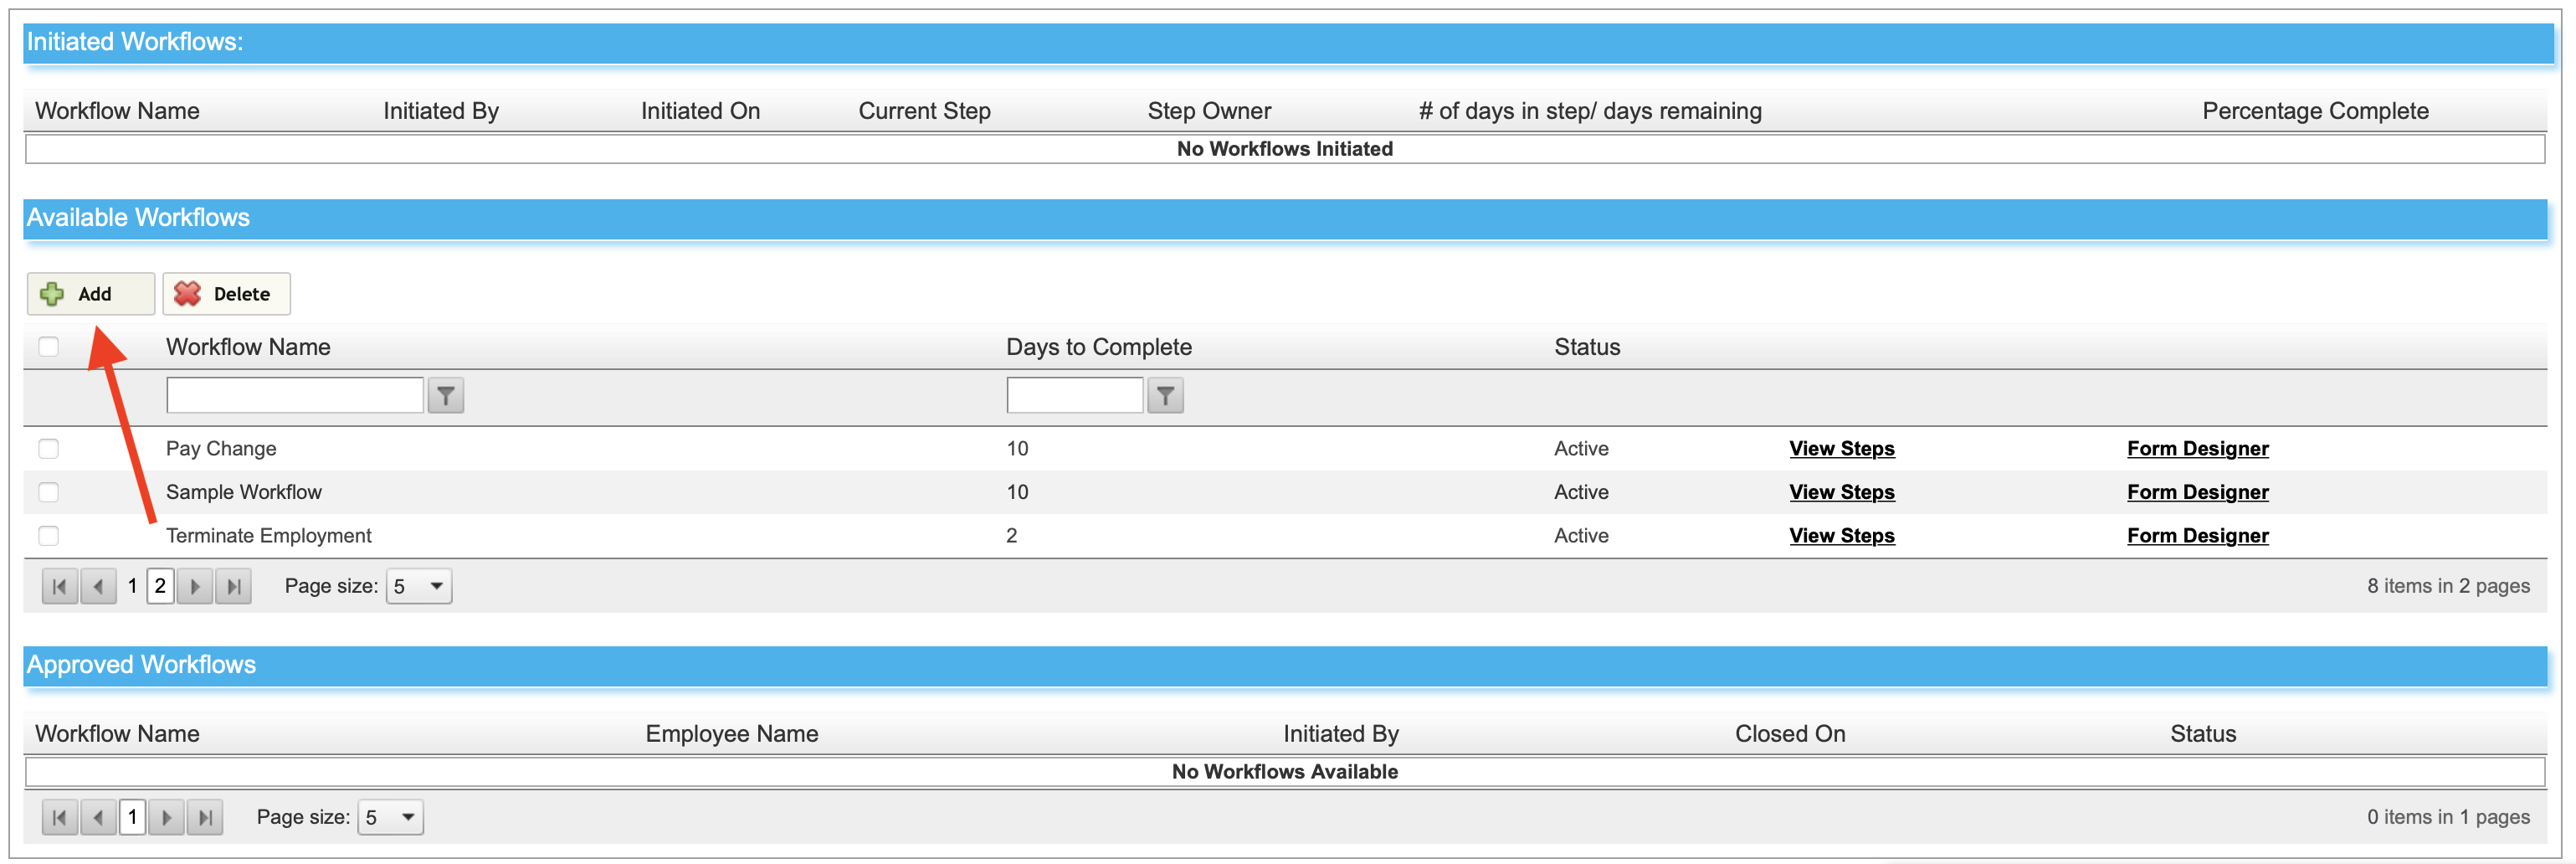
- Click Add.
- The fist step is to give your workflow a title, completion time, and the Initiator. This will be the person that starts the workflow.
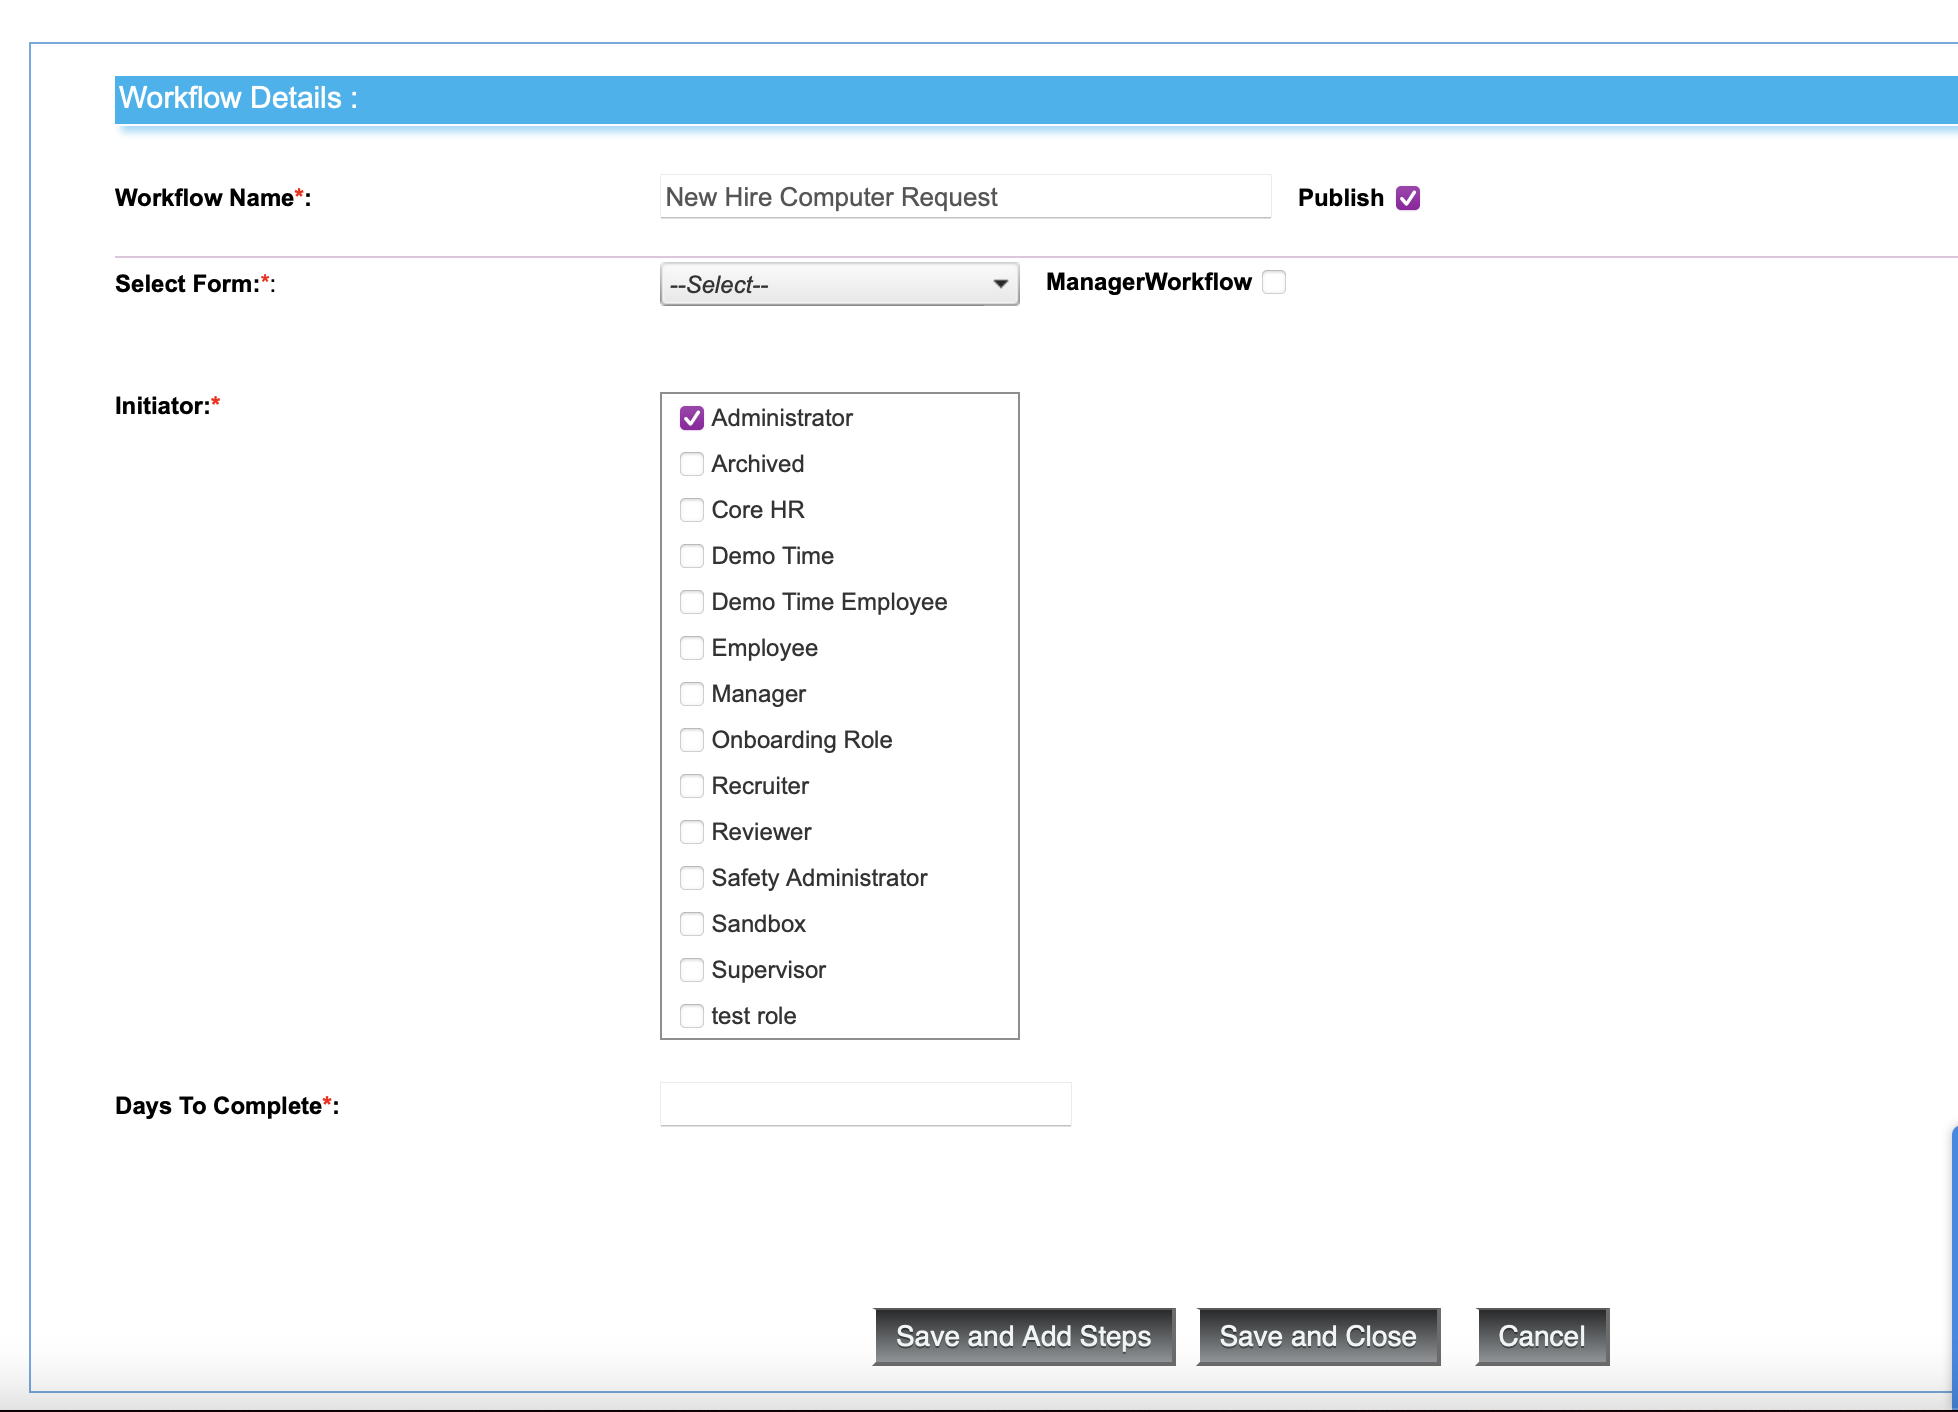
- Then select from the Form dropdown which fields will be used to trigger the workflow. In this case, we ill use the hire date of an employee, as well as their badge number.

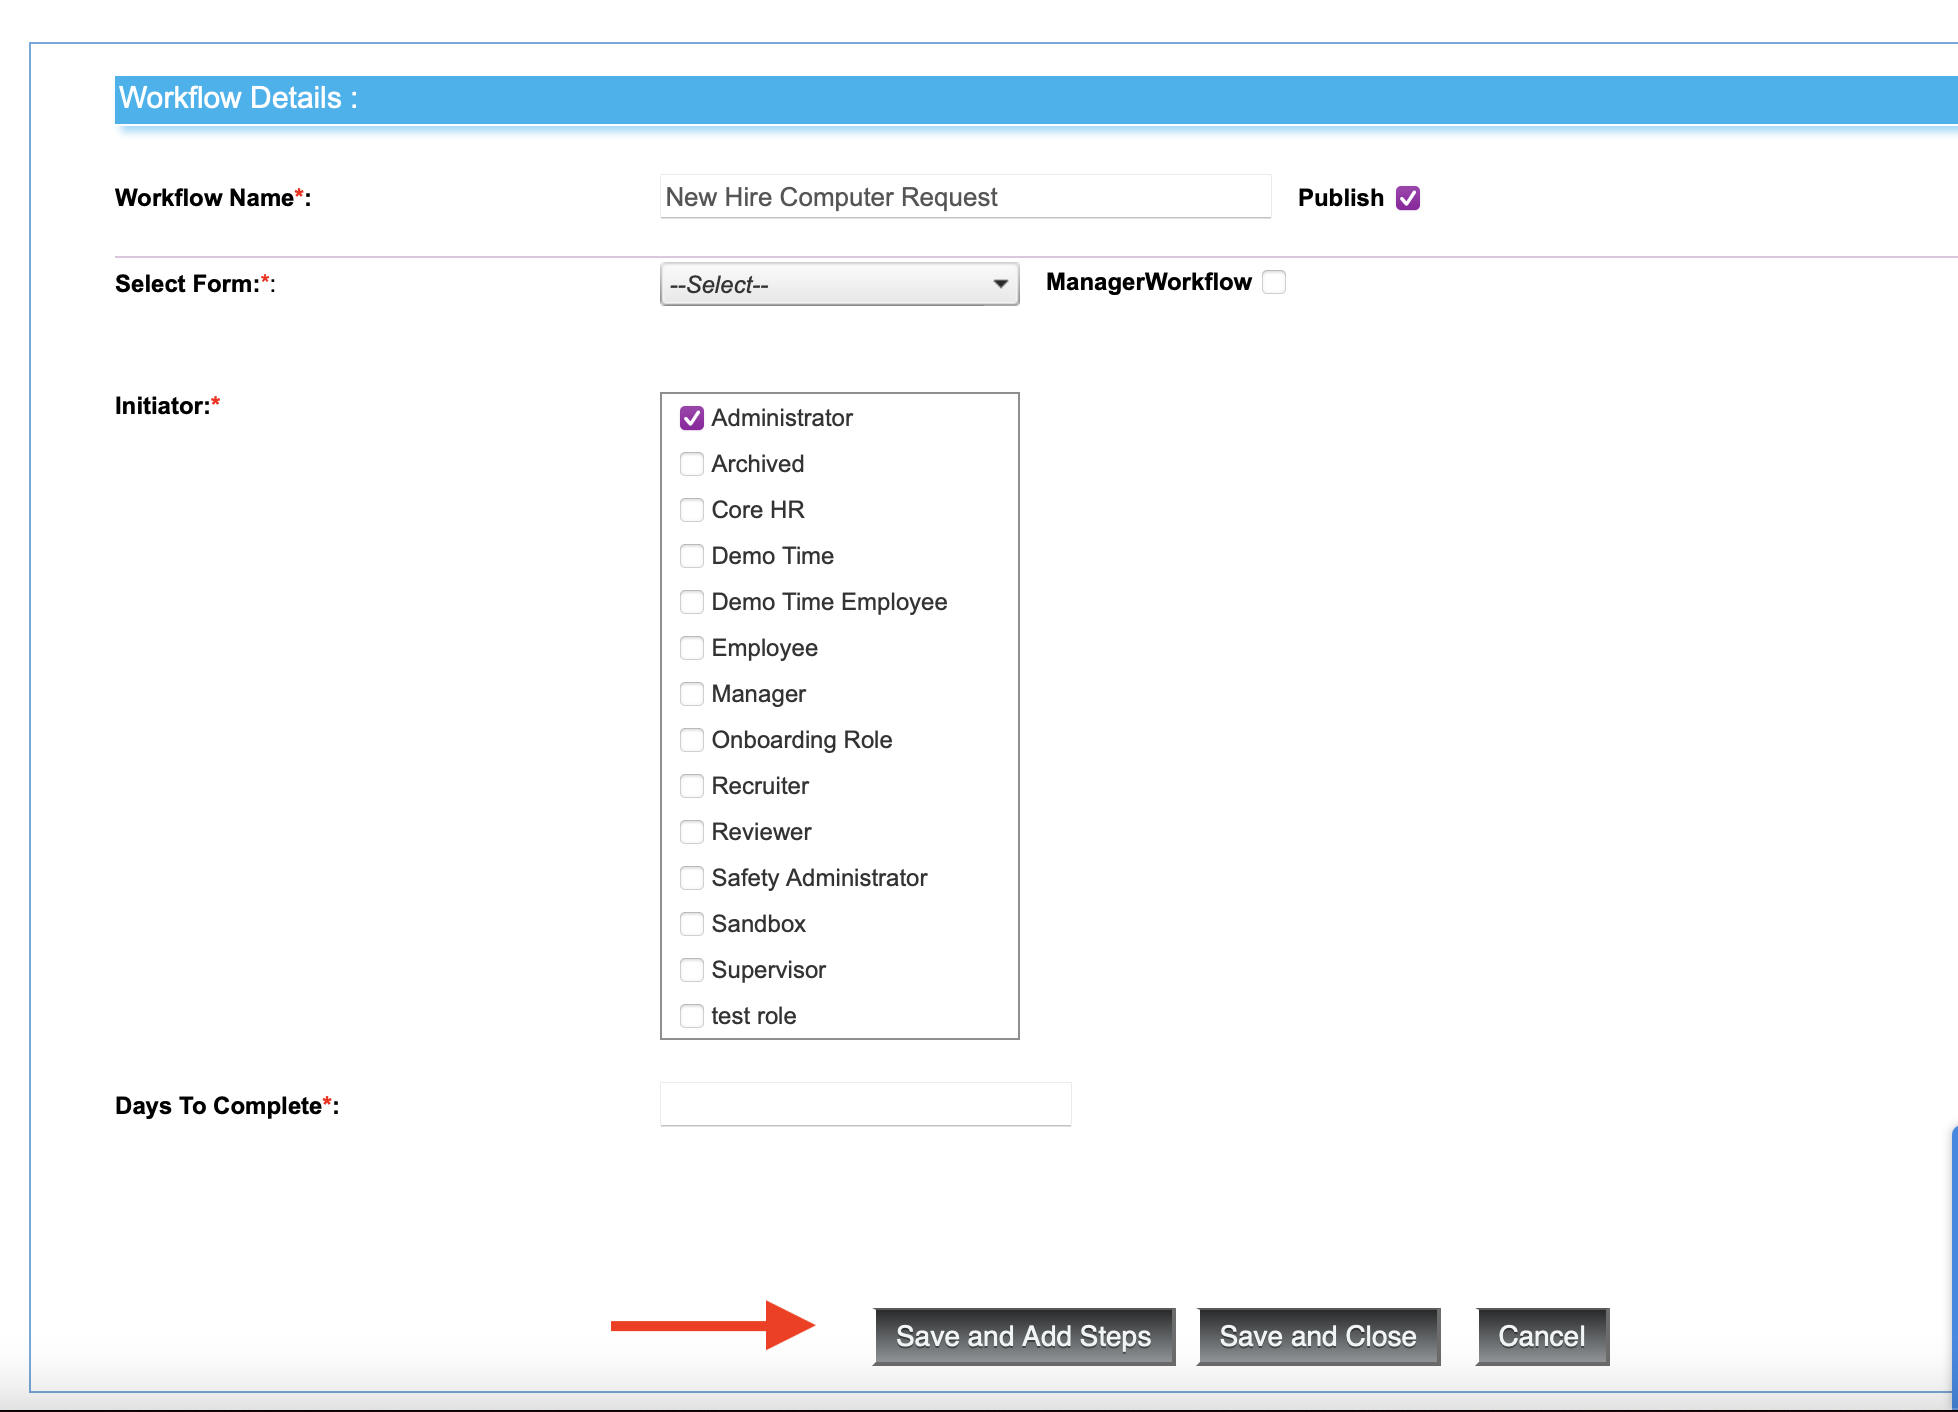
- Once you have made your choices, click Save and Add Steps.
- In this example, we will have two steps, and one of those steps will have two rules. The first step will need a title, and a step number, if you want. The participant for step one will always be the initiator.
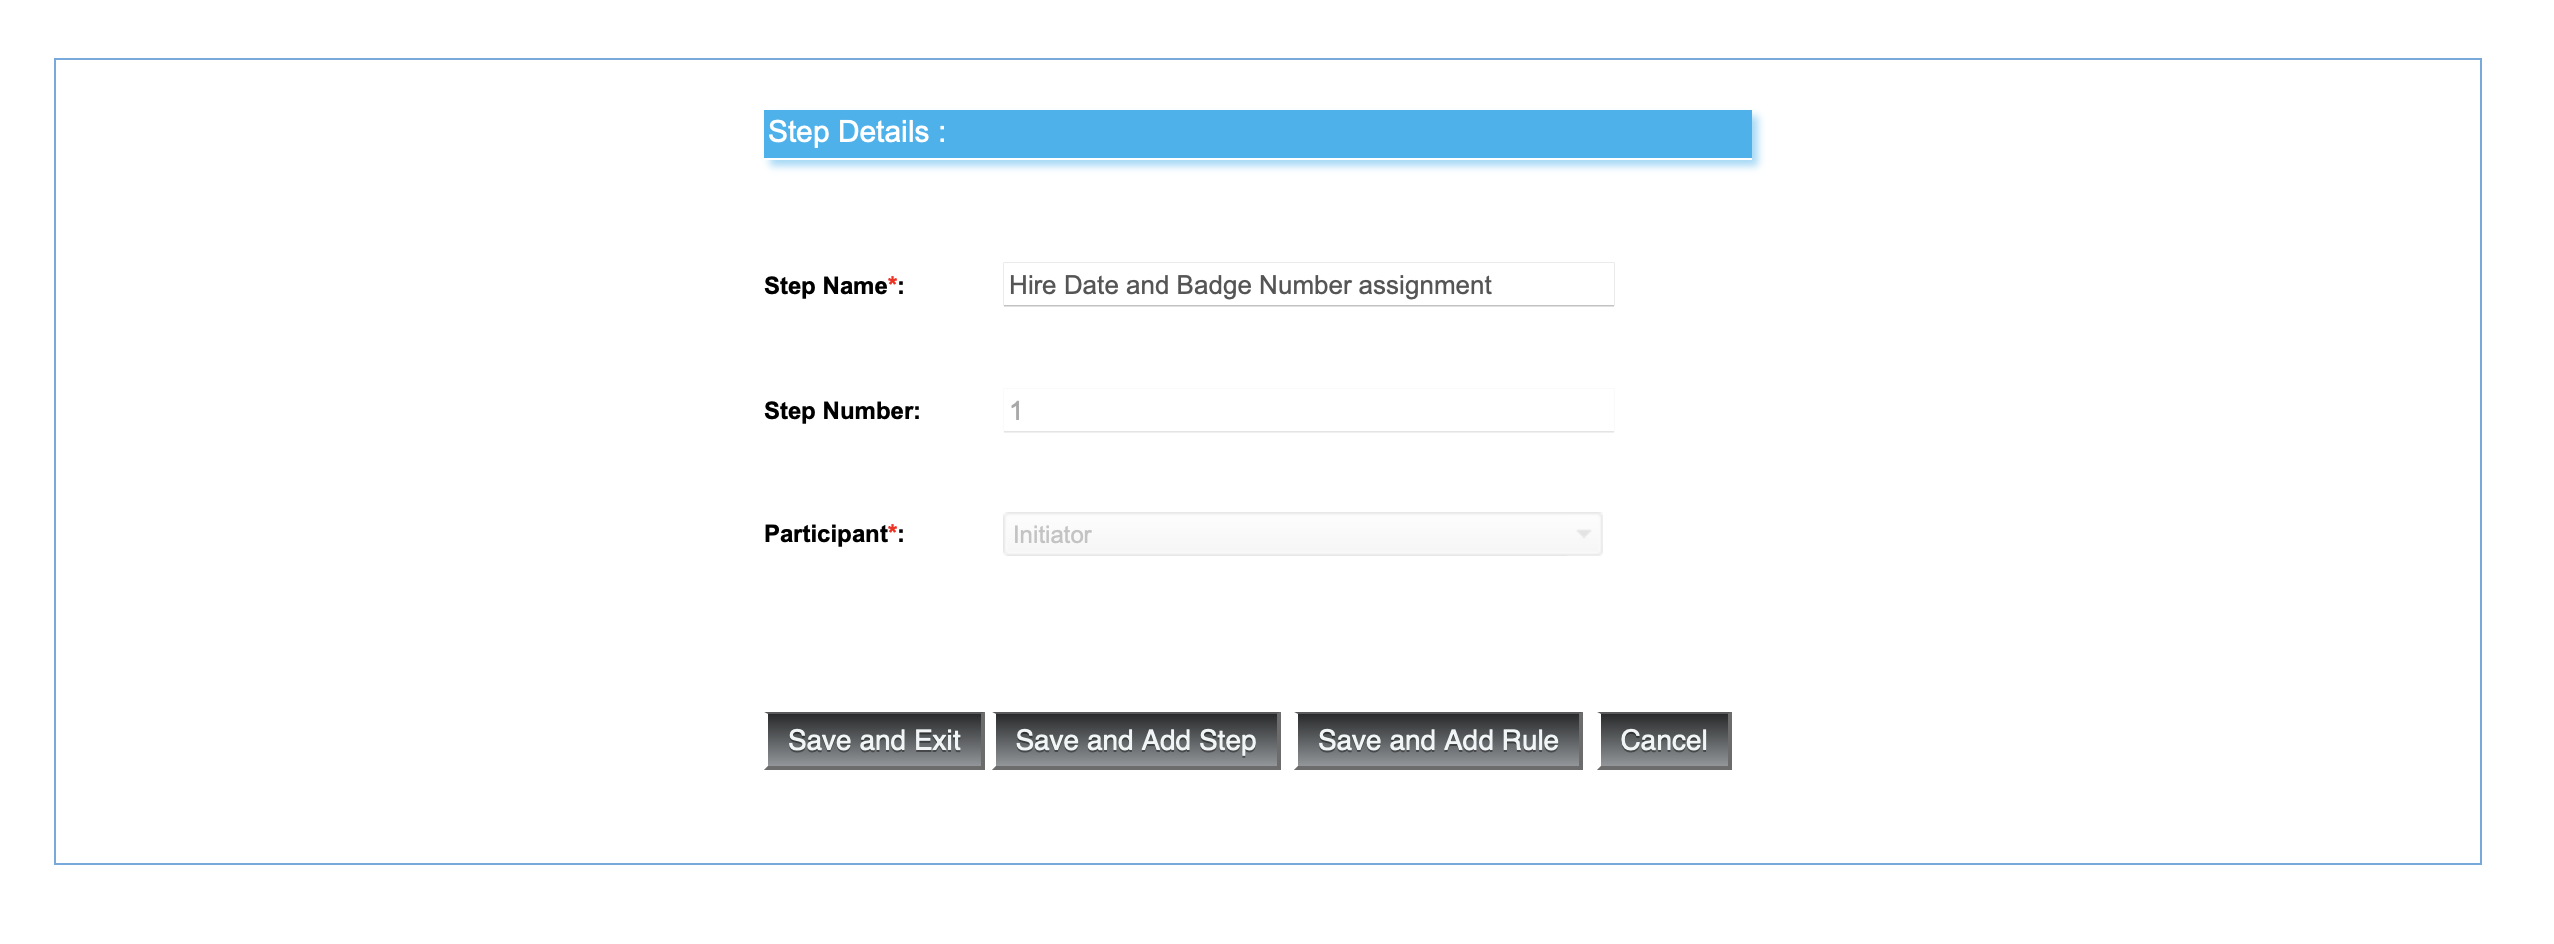
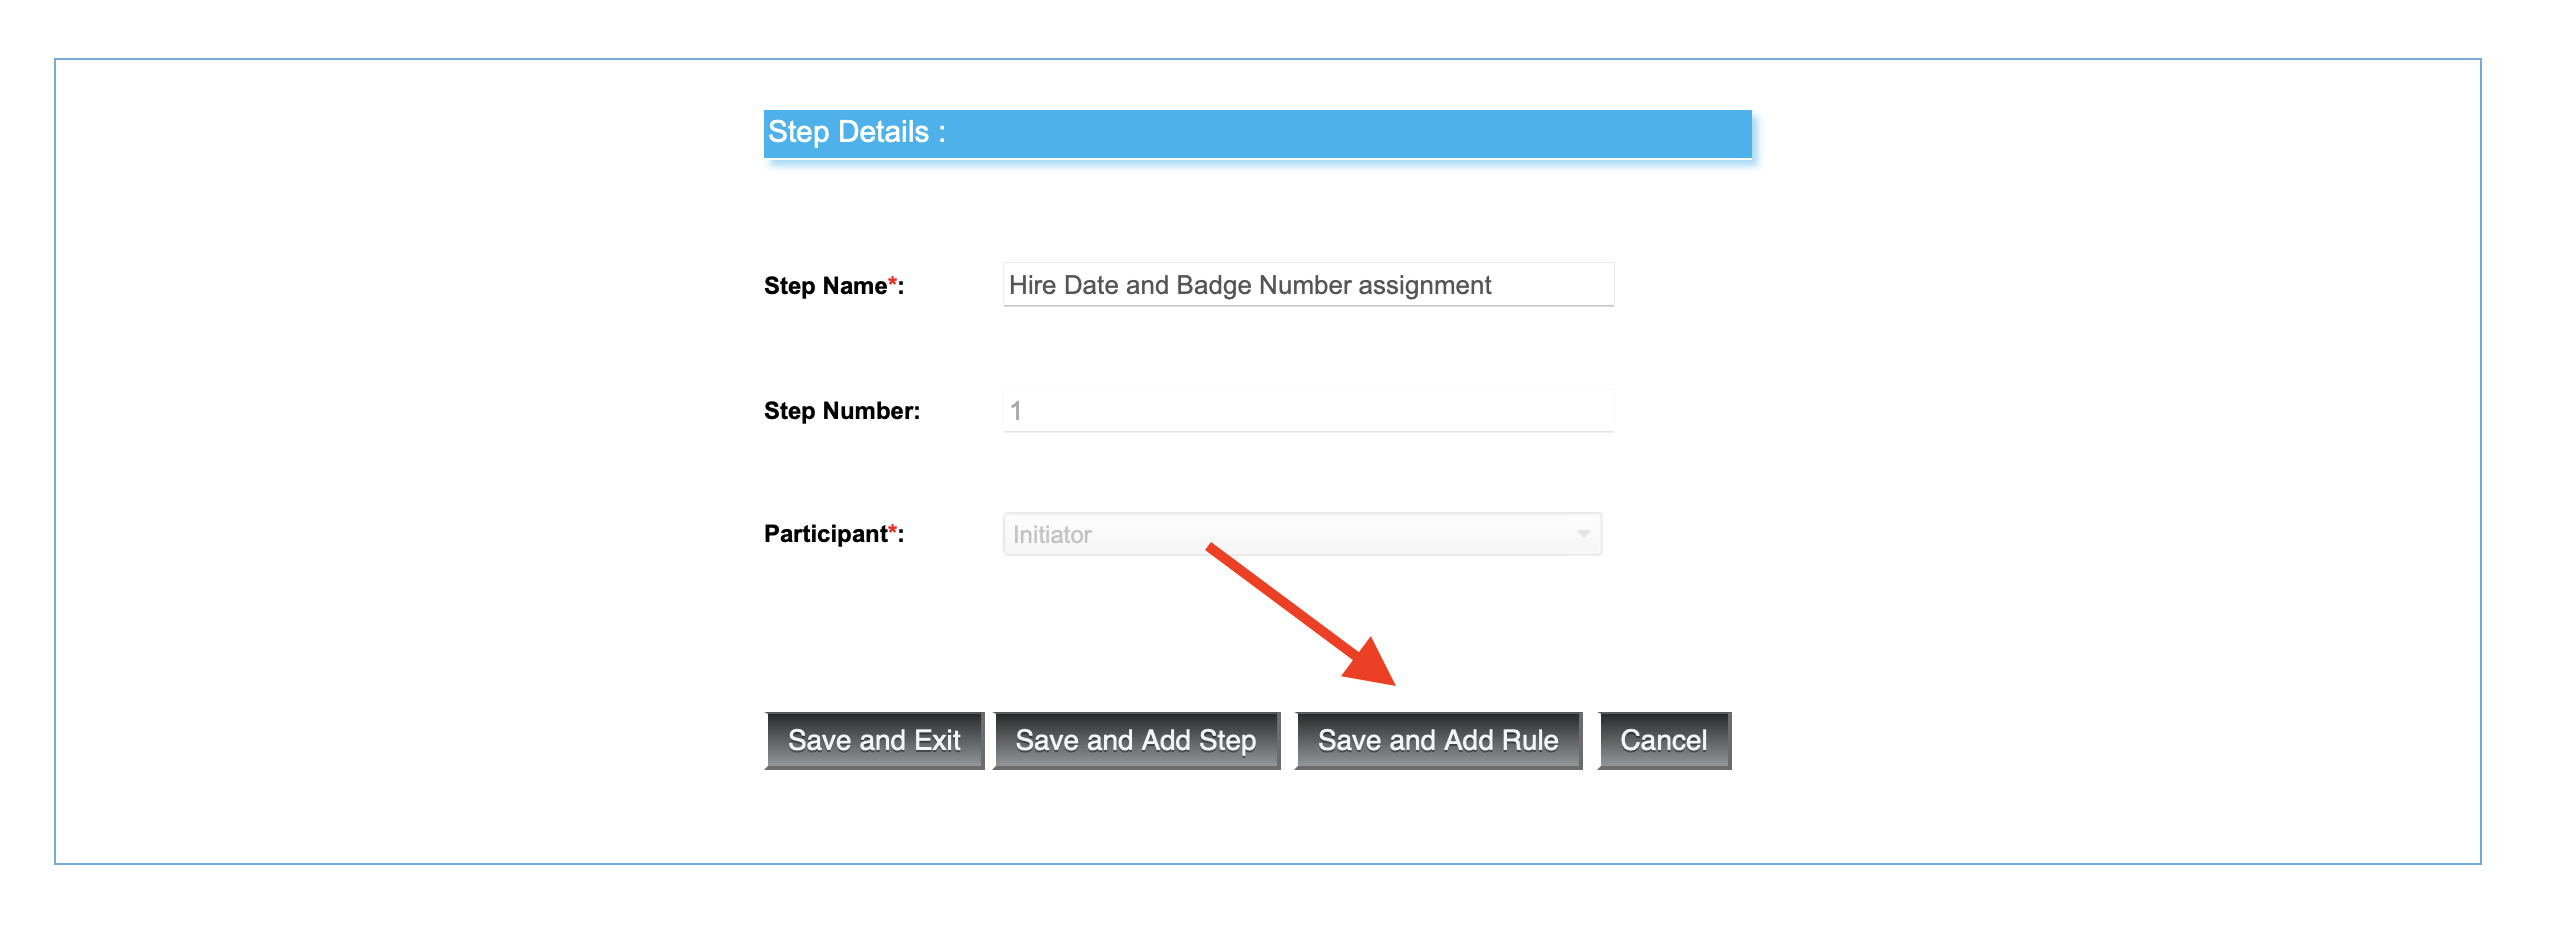
- Then click Save and Add Rule.
- Rules behave similar to filters in reports; they are the conditions on which the workflow will trigger or not. In this example, we will run the workflow if a hire date is after November of 2020.
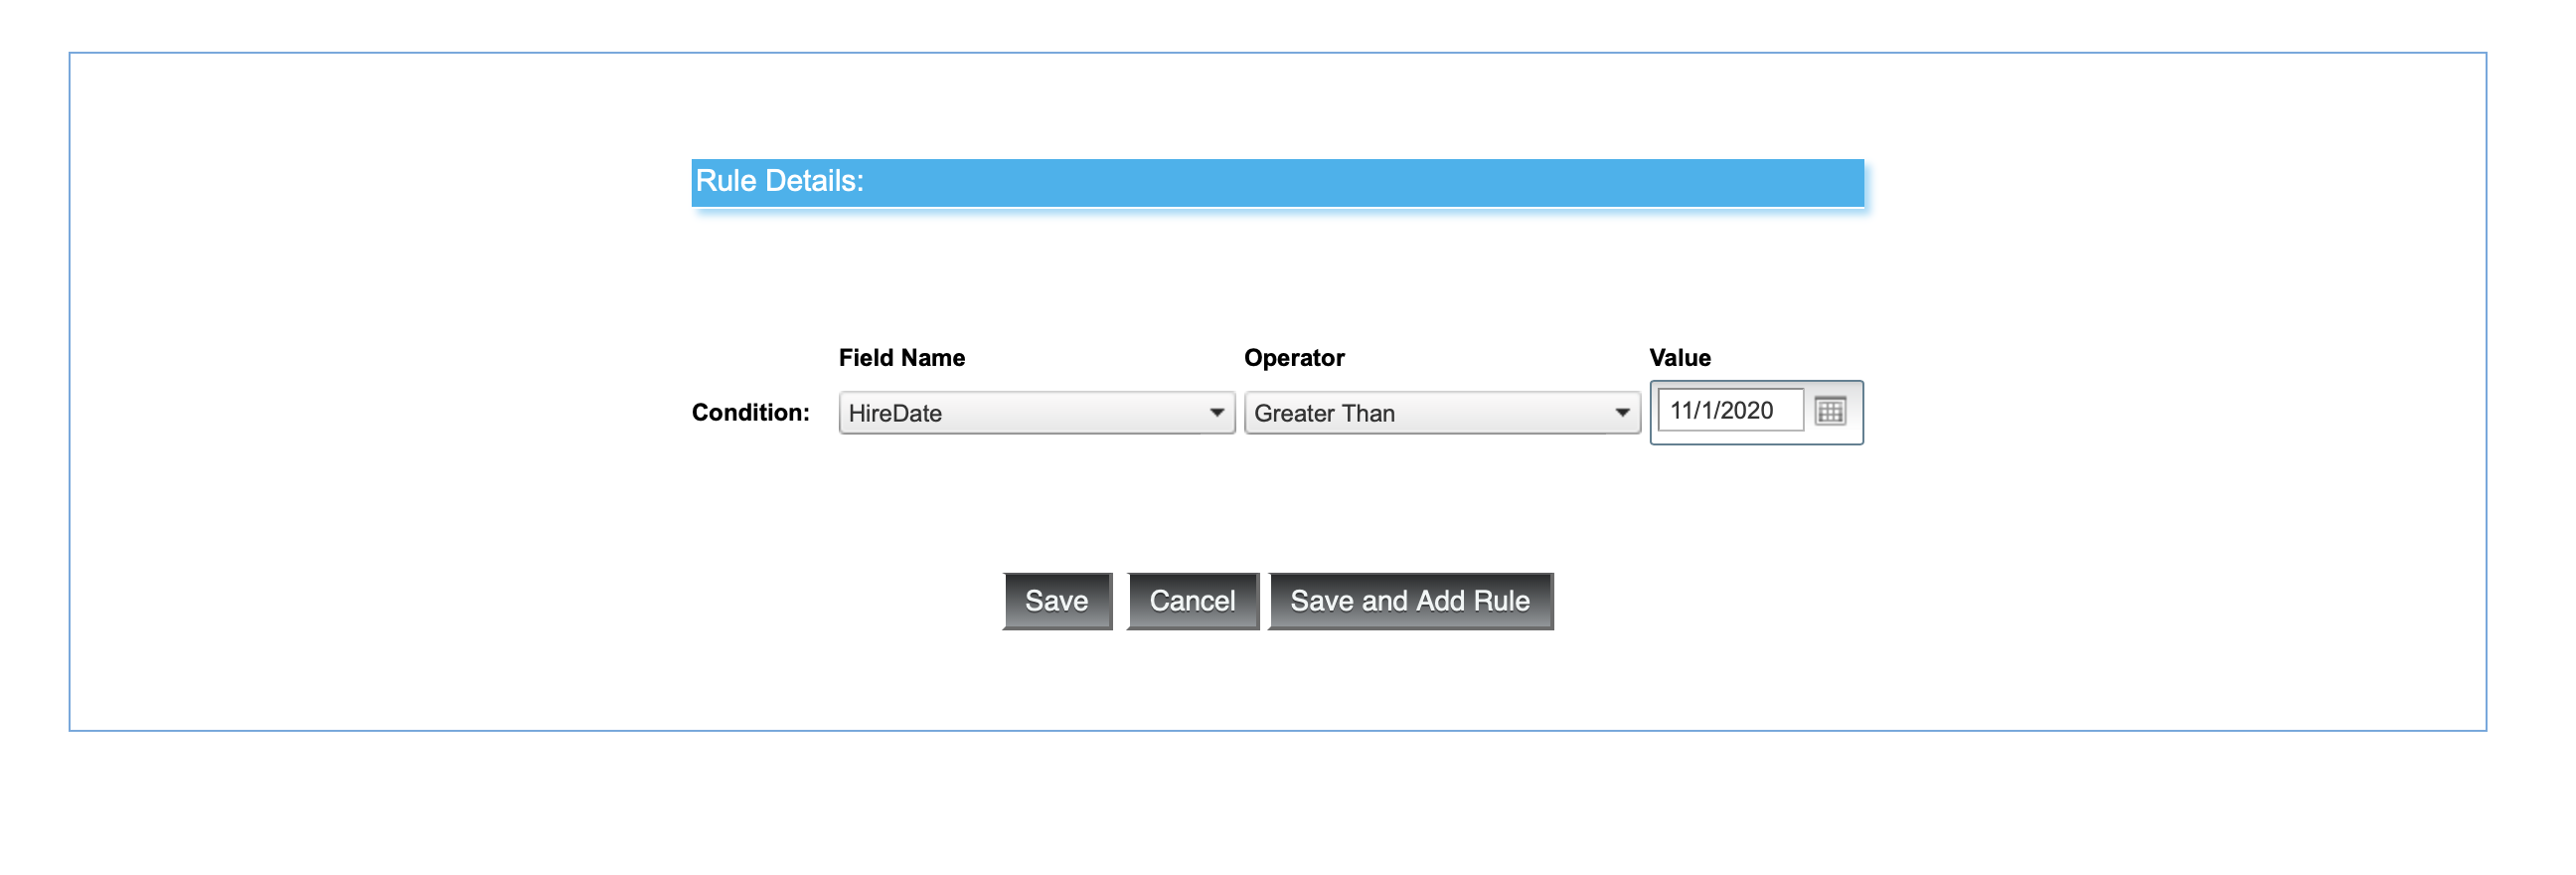
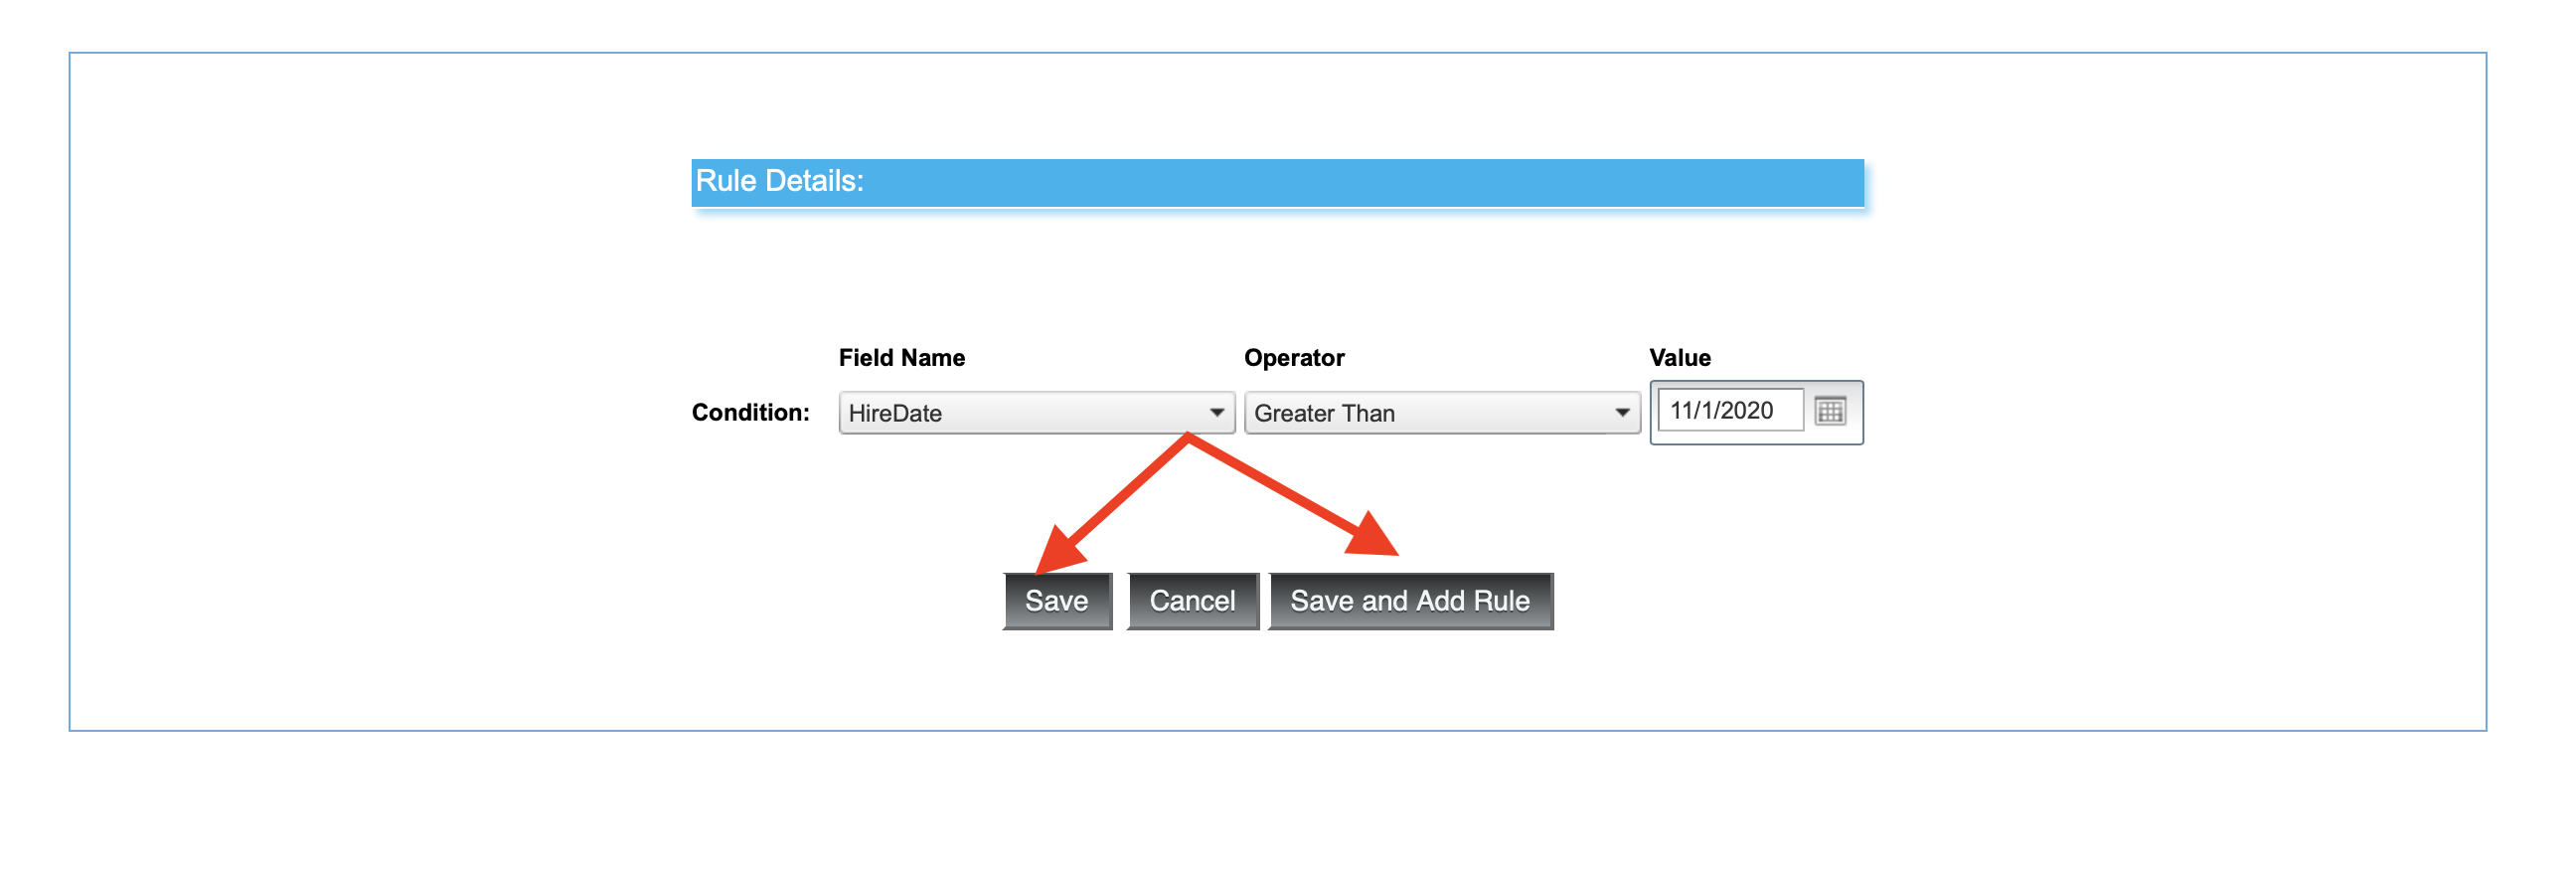
- From here, you can either Save and finish, or click Save and Add Rule to include another rule. Either way, when you are satisfied with your rules, you will hit Cancel. Don't worry, this doesn't take away any of your work. It just means that you are done adding rules and are on to the next step in the workflow.
- For our second step in the workflow, we will create a title, and choose who is meant to participate in this step. This example will have one participant.
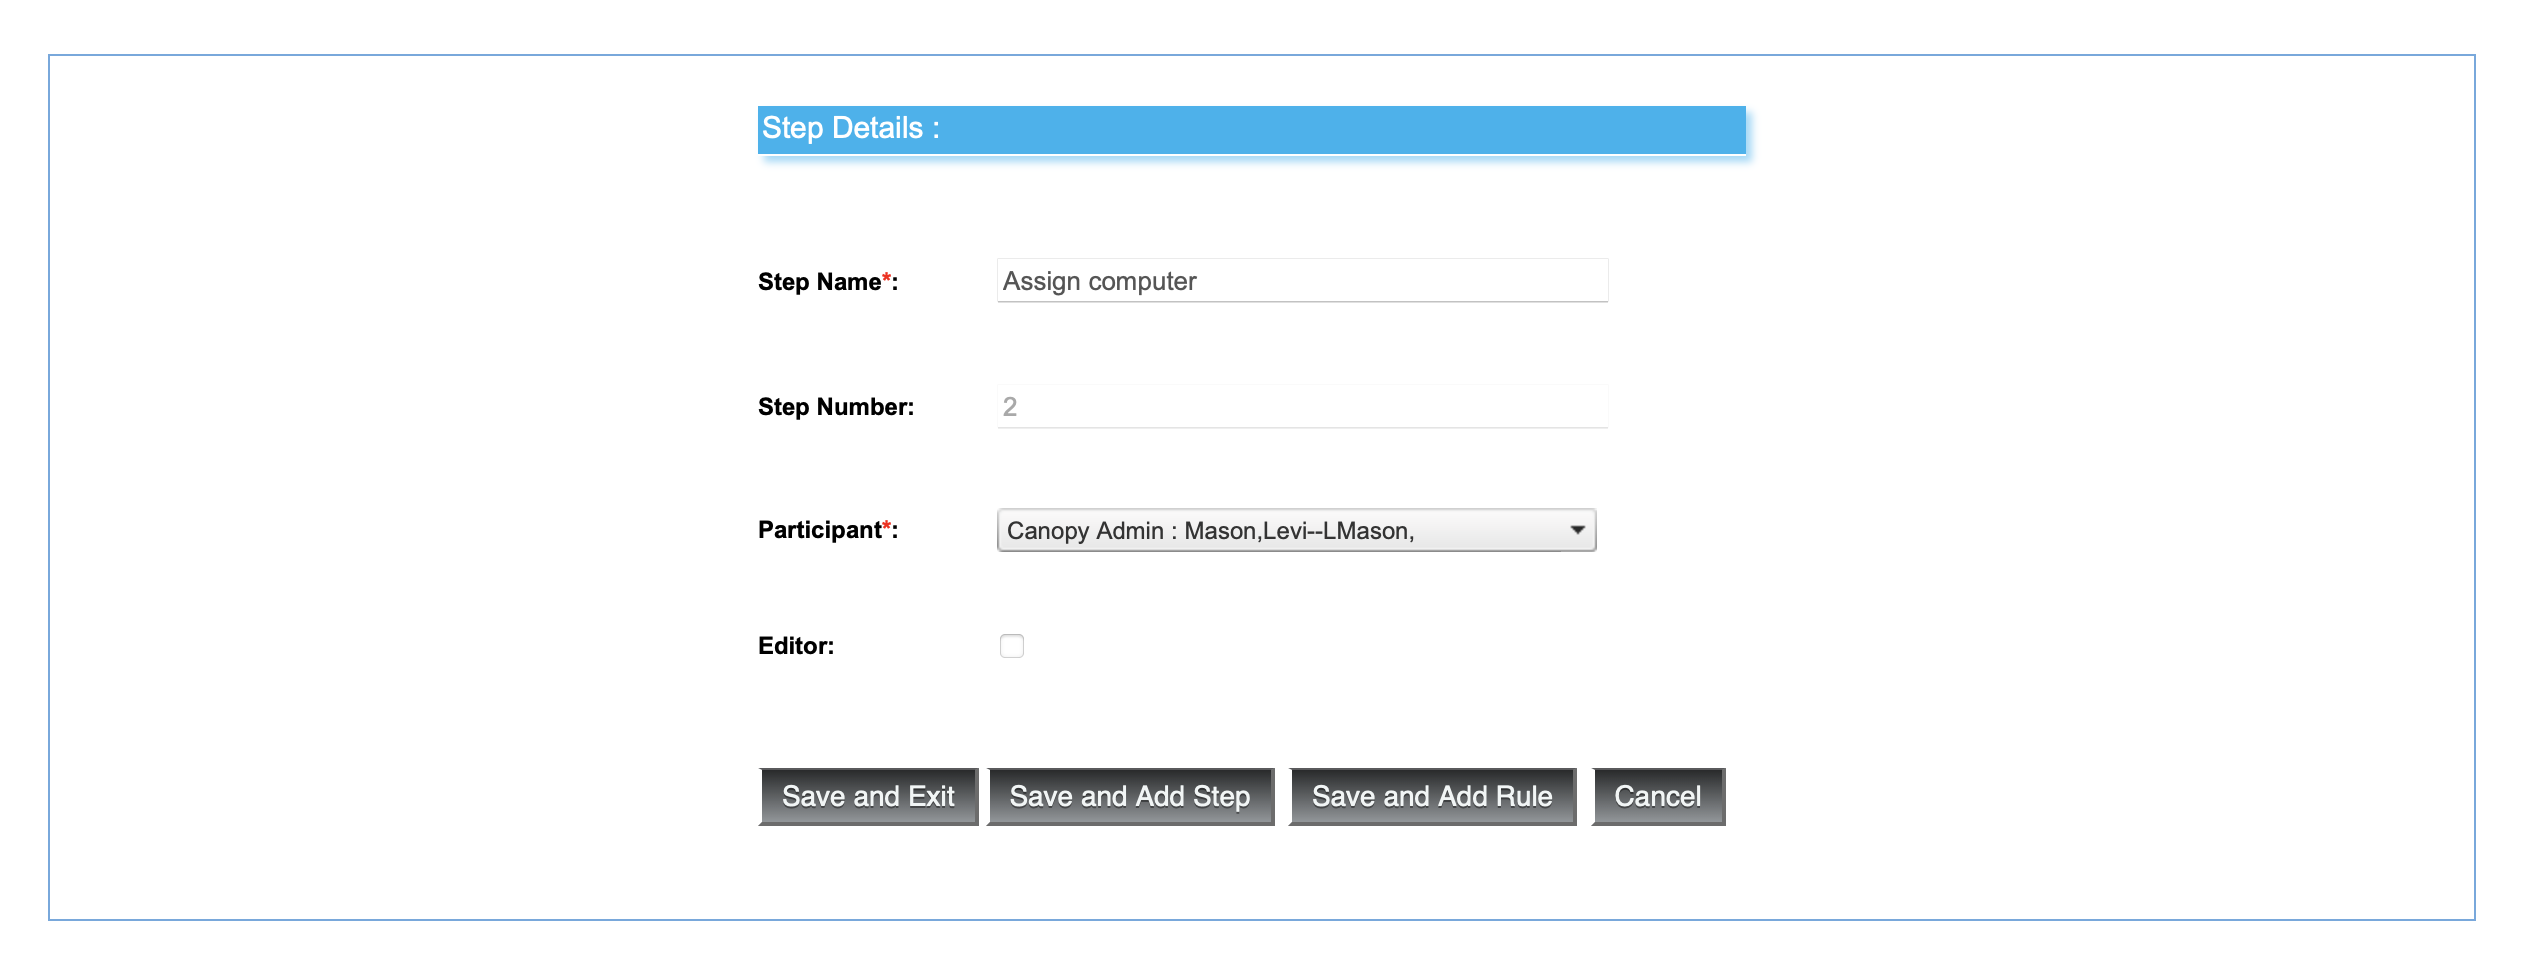
Since we are done with making steps for this workflow, we can click Save and Exit. - The final piece is choosing who will be notified of this workflow occurring...


and creating the form from the Form Designer. This lets you include additional instructions, if necessary.
The workflow will now appear in the table!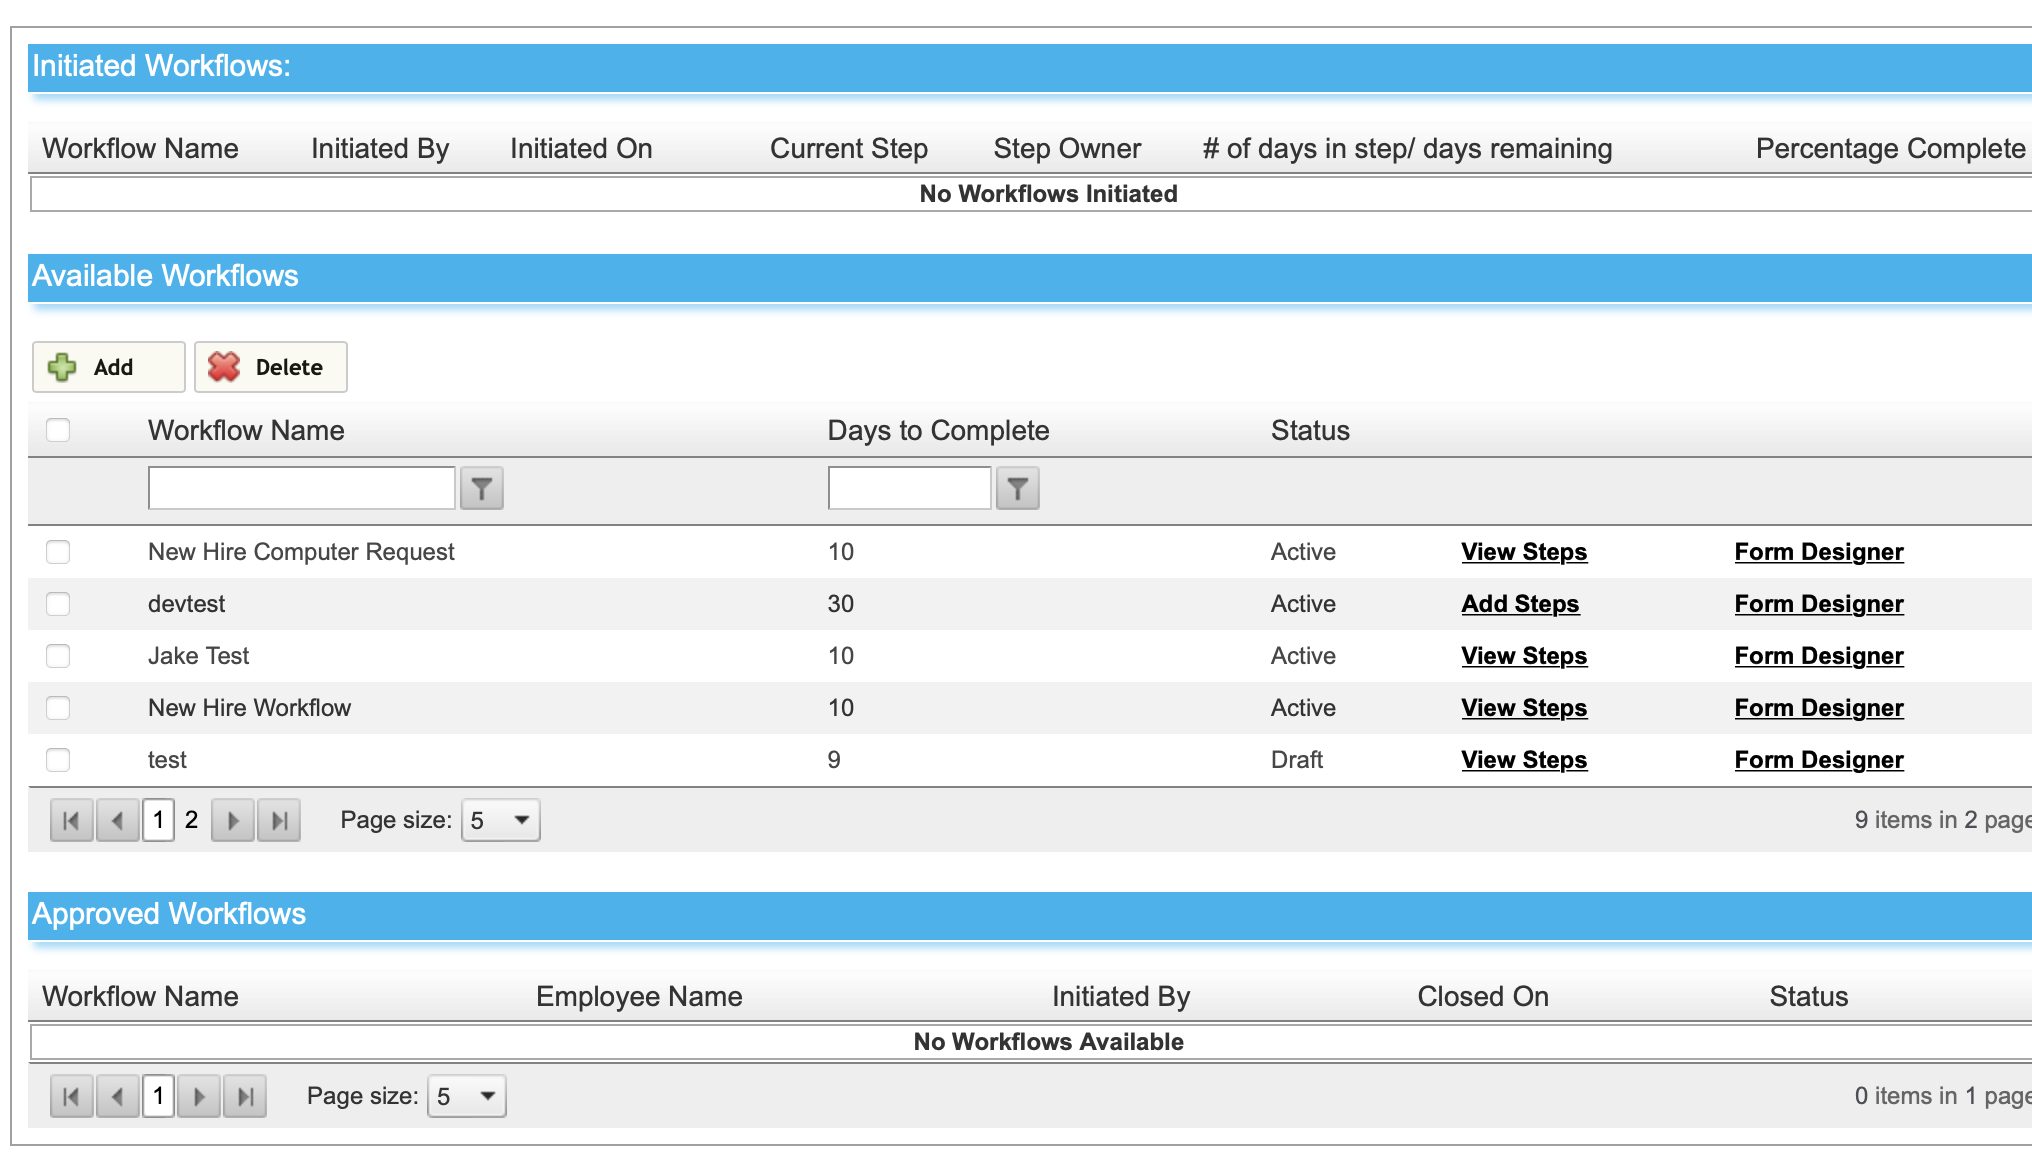
You can numerous fields in workflows, including custom fields and custom forms!