
How to make a custom role in Canopy
CanopyWS allows you to make custom roles that you can assign to employees. This is useful if you have varying levels of supervisors or Human Resource administrators.
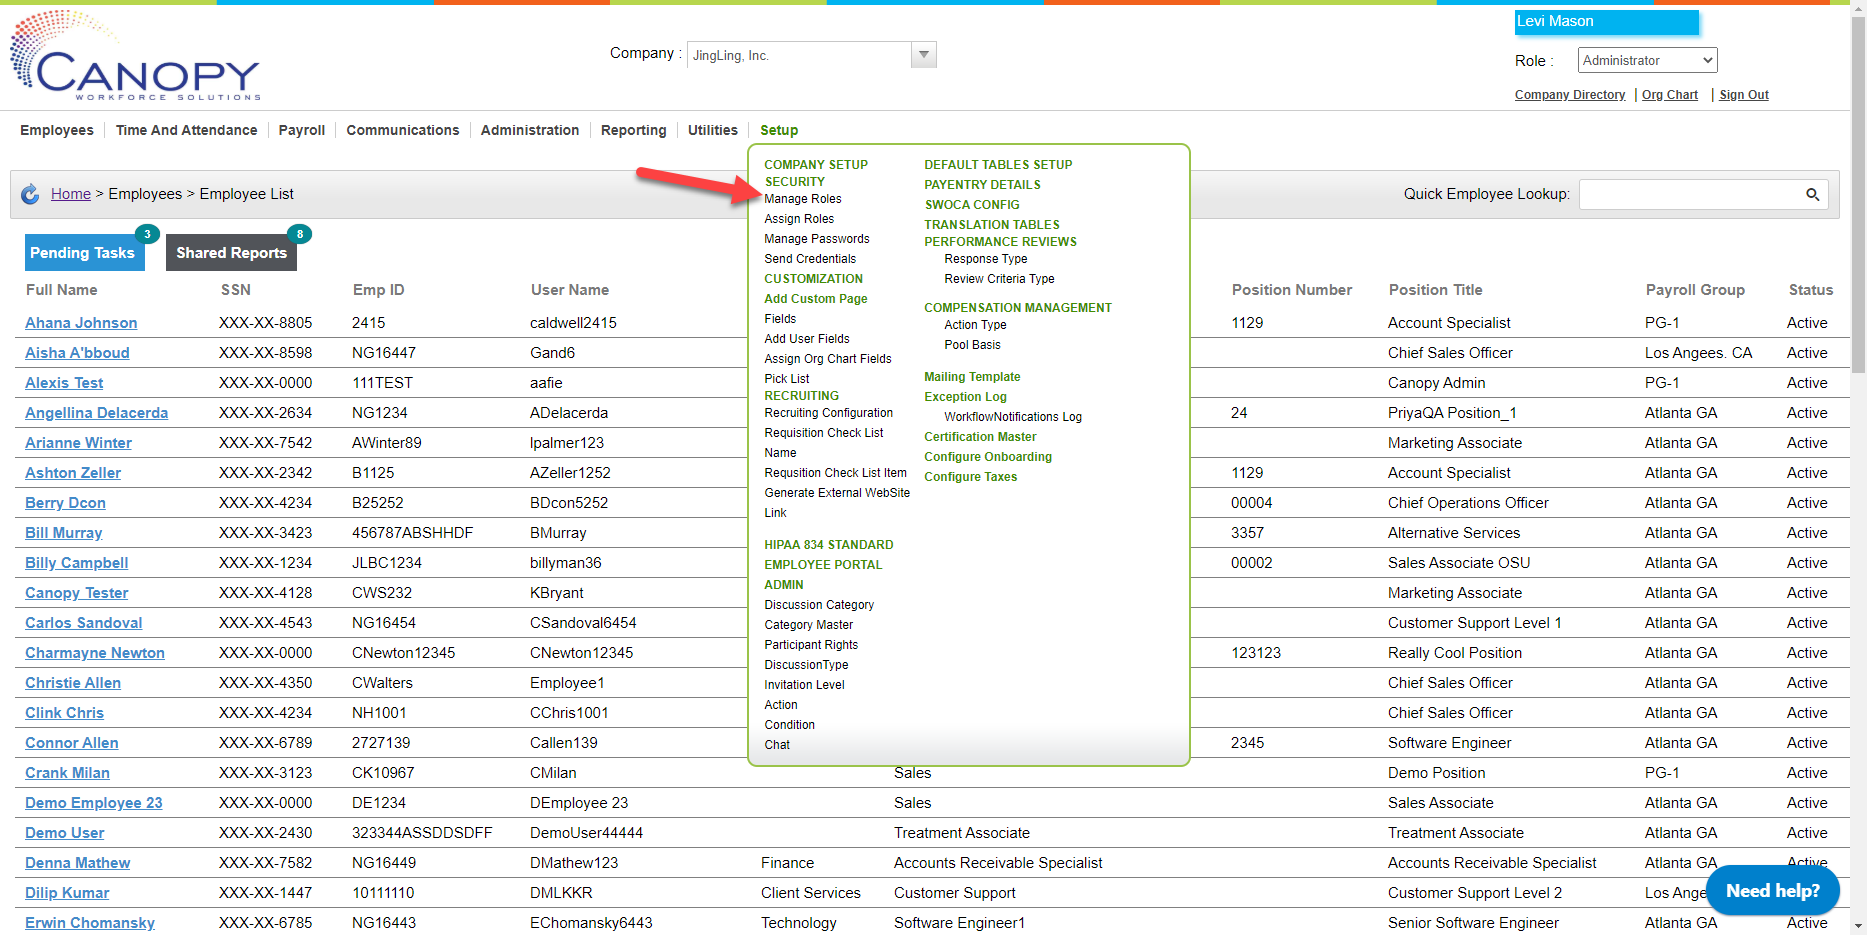
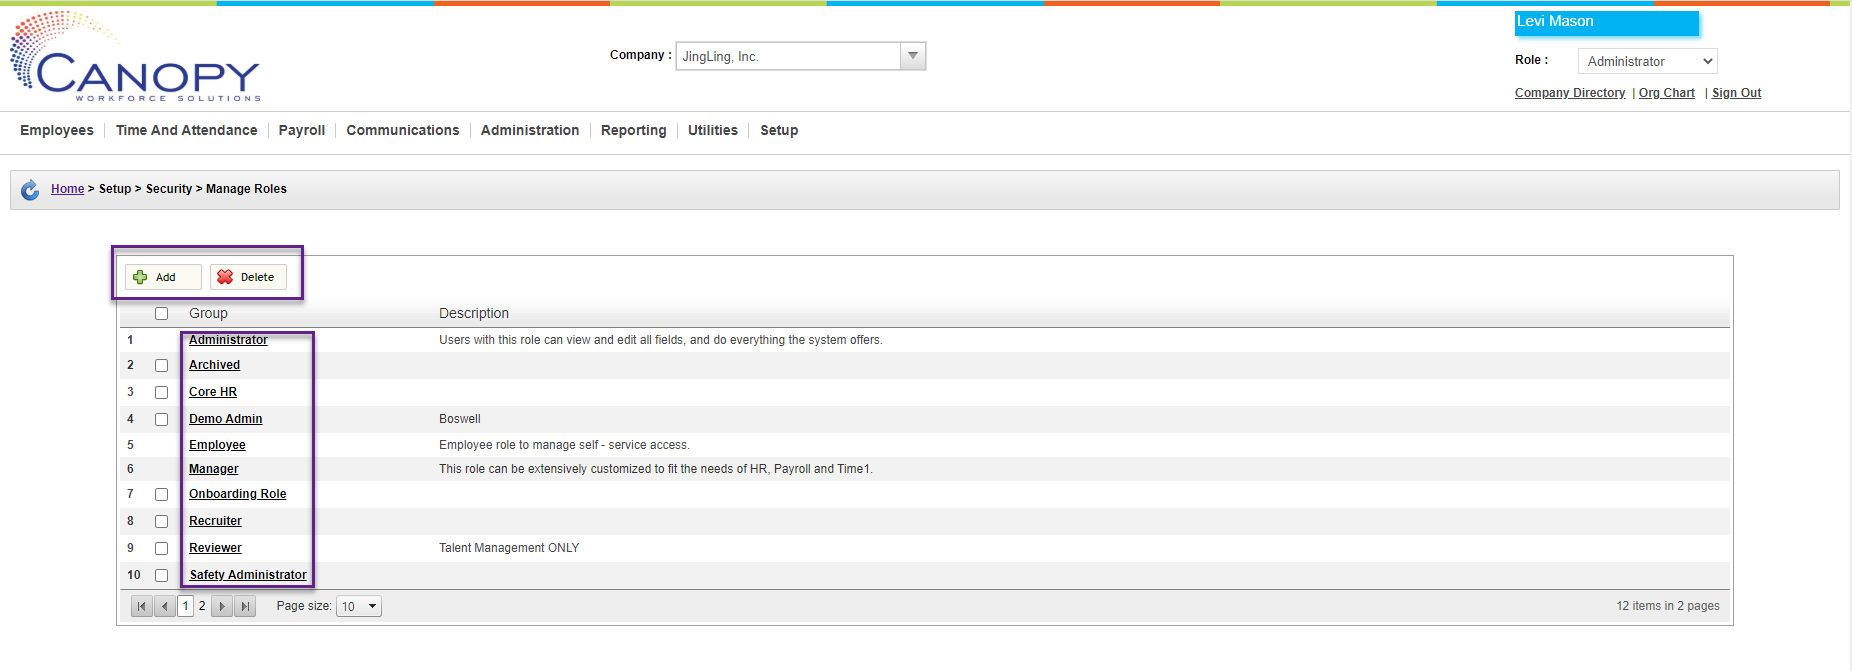
To begin, we will need to be on the Manage Roles screen, accessed from the Setup tab. This screen displays all the roles you have created and gives you the ability to edit, add, or delete.
Instructions
From the Manage Roles screen:
-
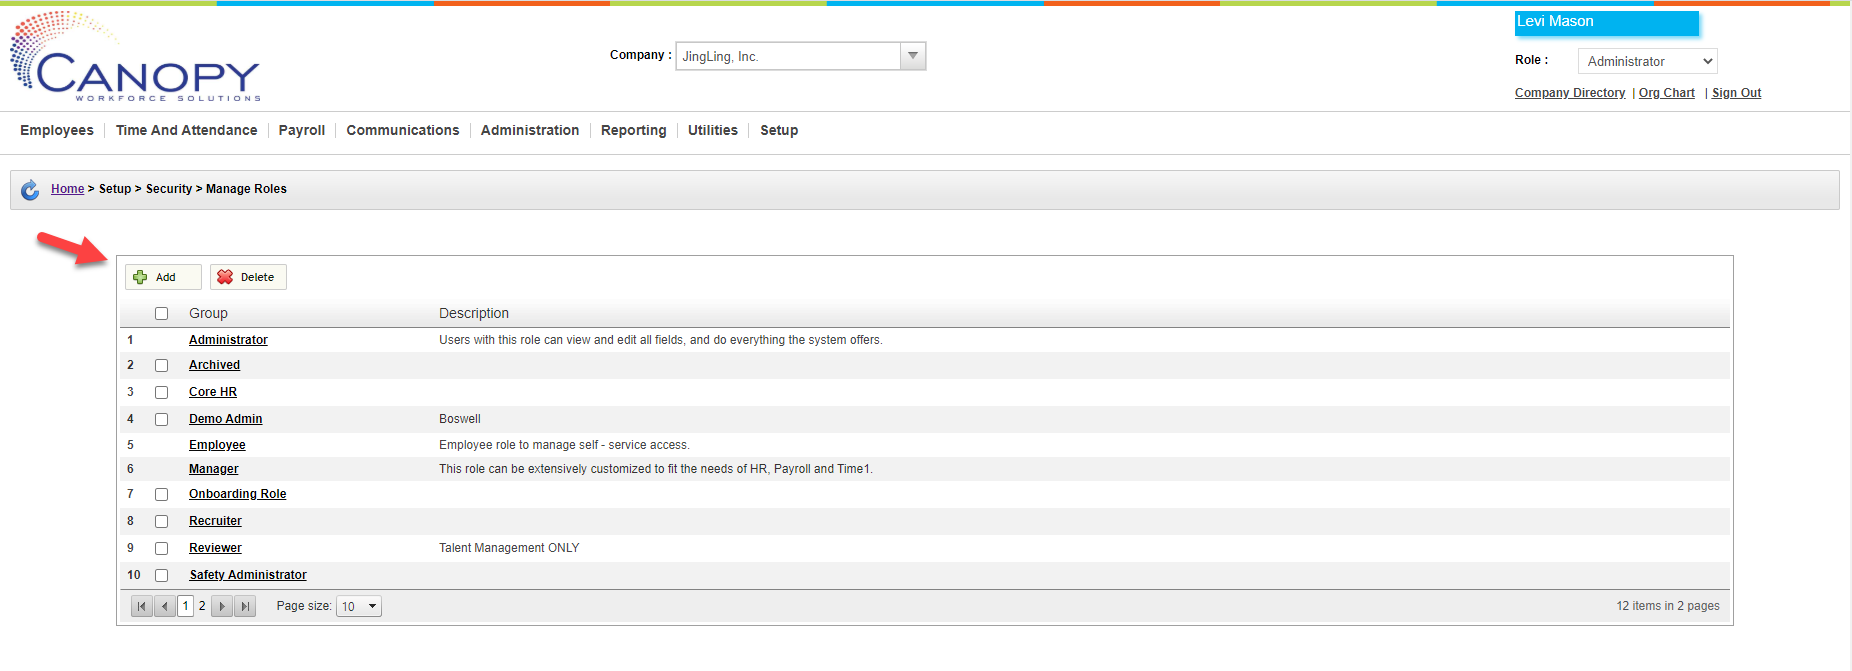
Click on Add Role.
-
The following screen lets you control what information the new rile has access to. One way to save time is by copying access from an existing role. In this example, we are going to copy the existing “Administrator” role, and edit from there.
-png.png)
-
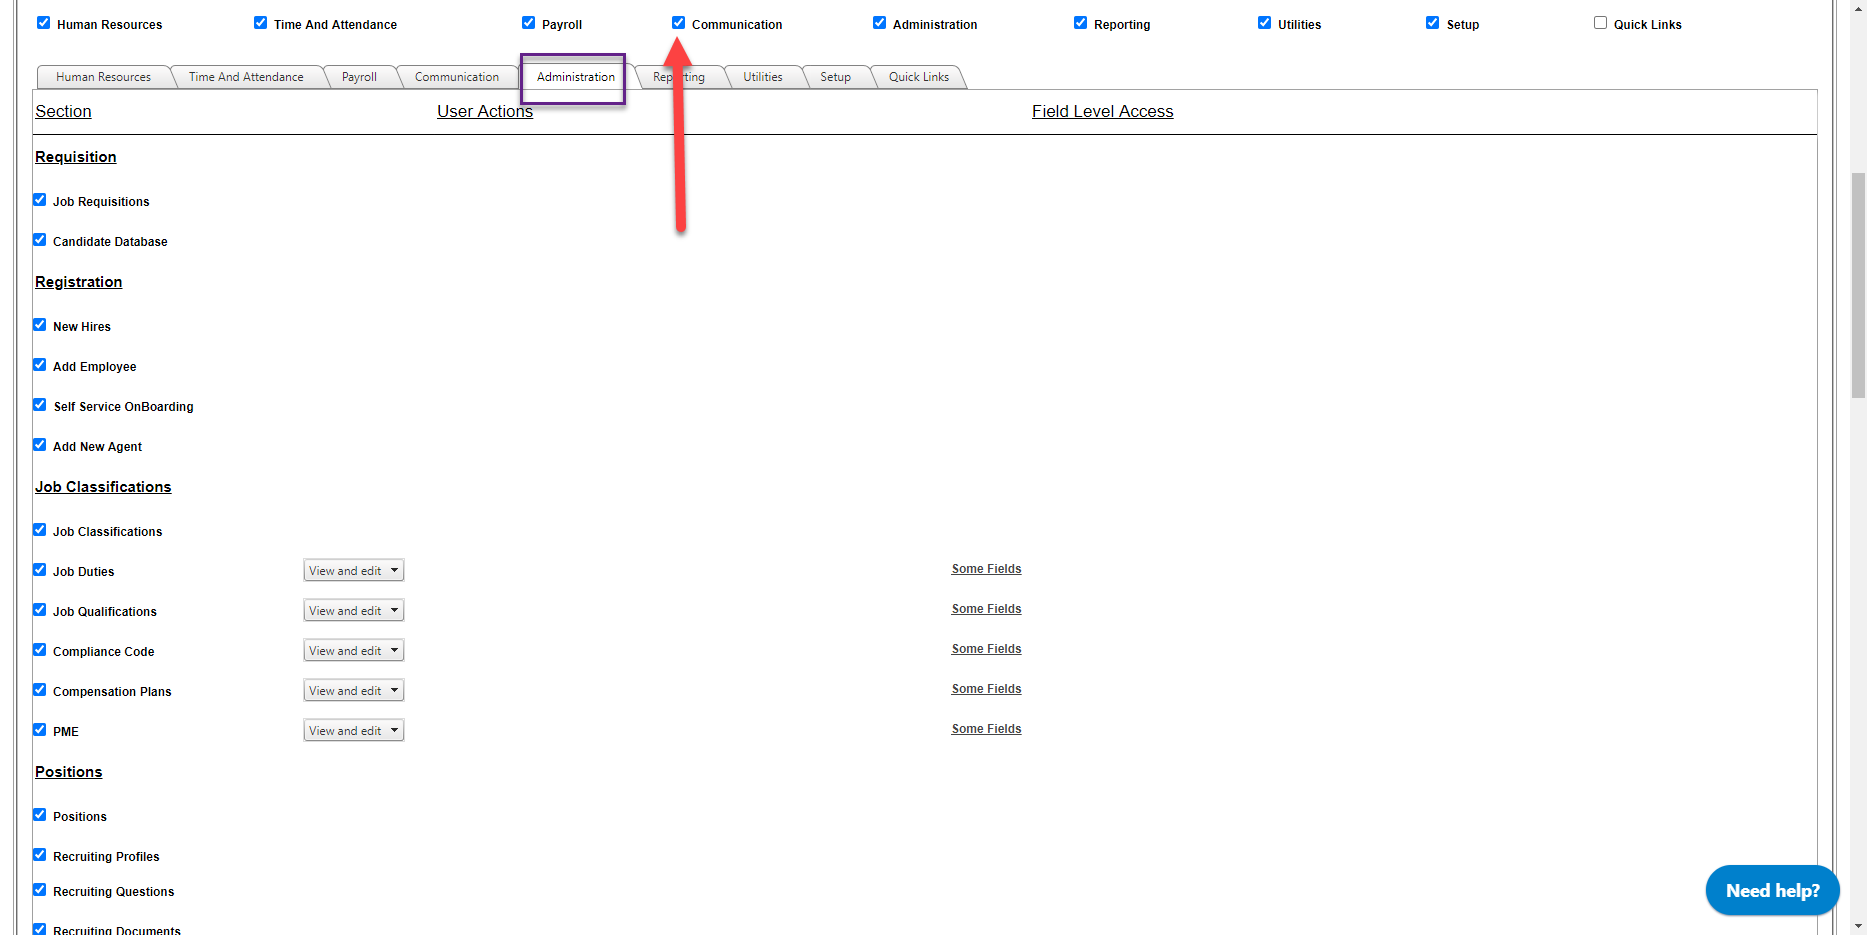
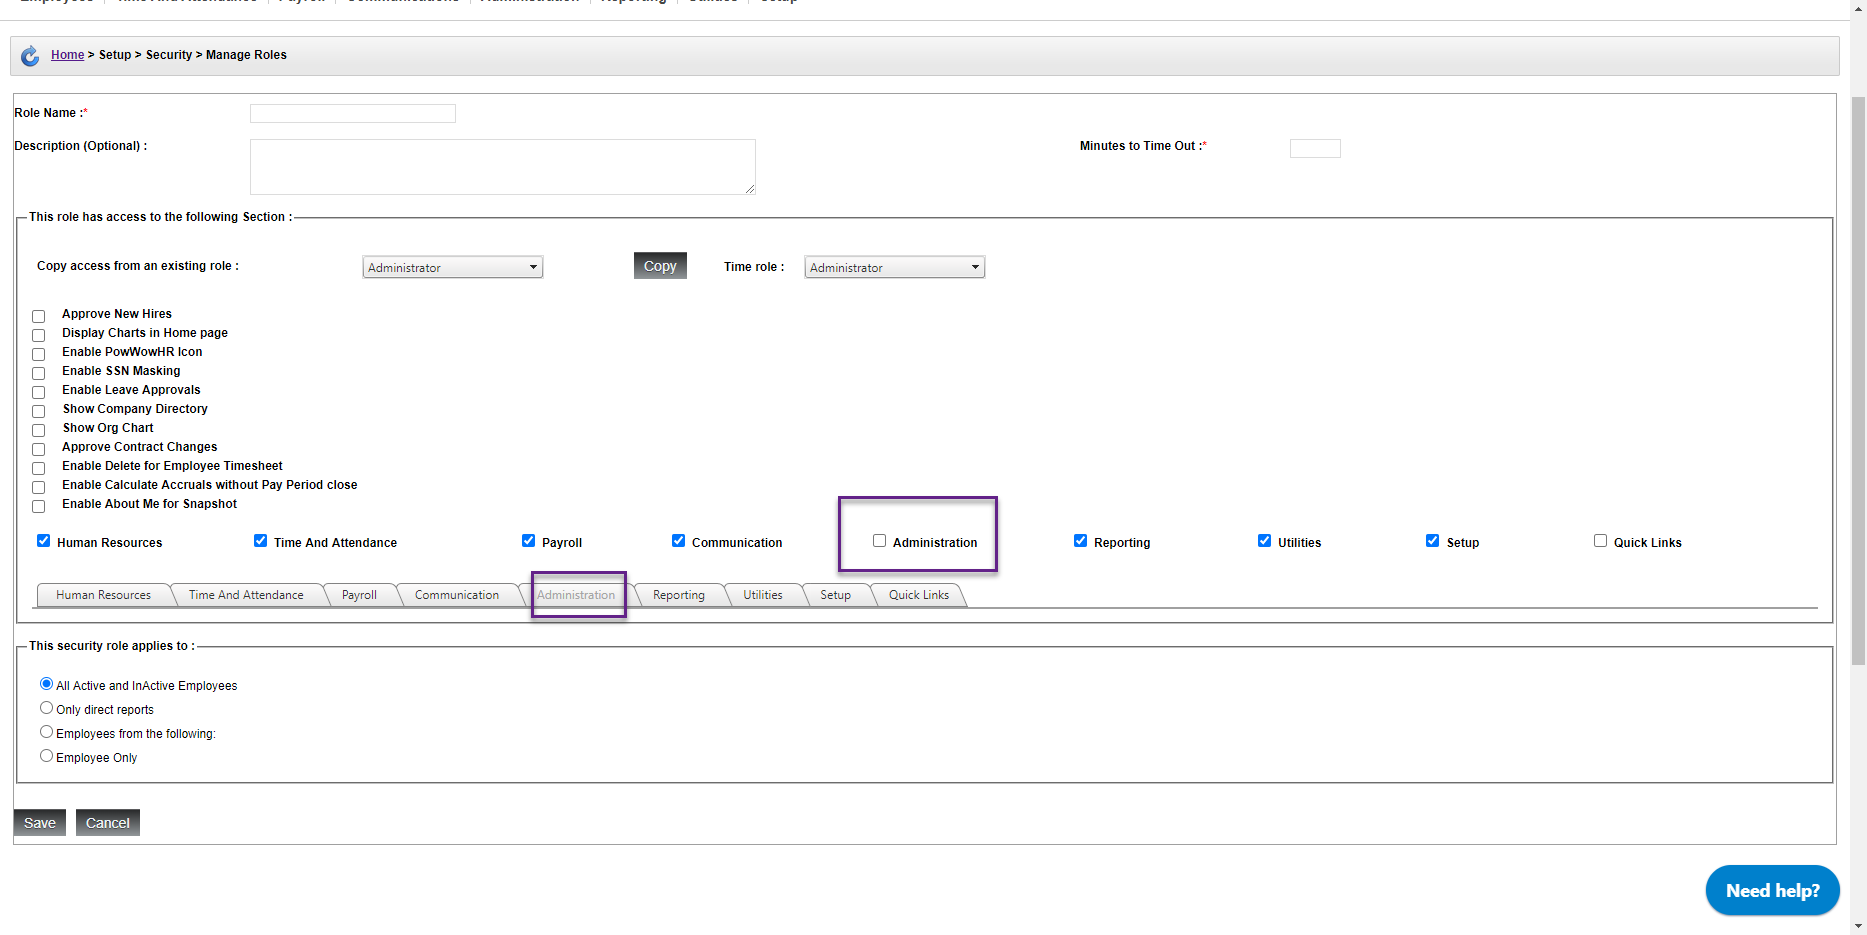
By clicking on the Administration tab, we can see that the role currently has access to all recruiting/new hire functions.
-
Let’s remove those by dis-selecting the checkbox next to Administration. Now the tab is greyed out, indicating that this role will not have access to this part of Canopy.
-
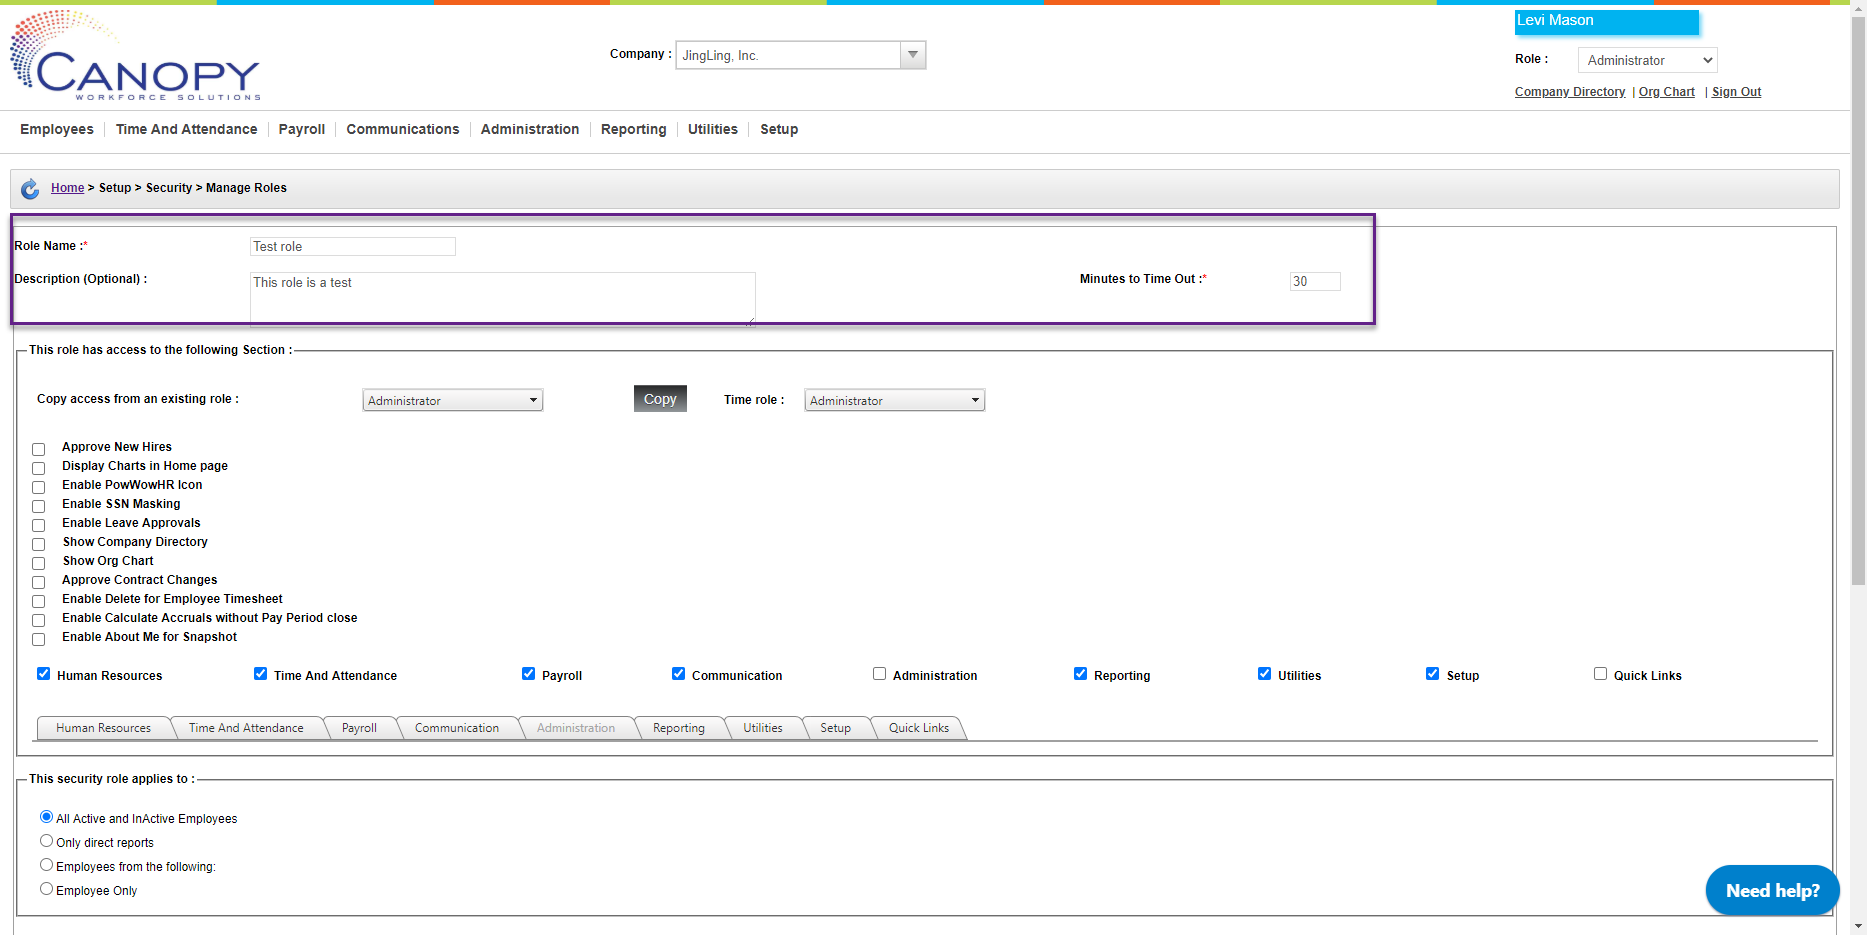
At the top of this screen, make sure to give this role a name and length of time before the site times out. A description is also nice if you have a lot of roles with similar functions.
-
Click Save.
Now when you view all roles, the custom one should be visible in the table!

If you want to hide access to employee’s social security numbers, be sure to check the box Enable SSN Masking.