Make new benefit plans in Canopy
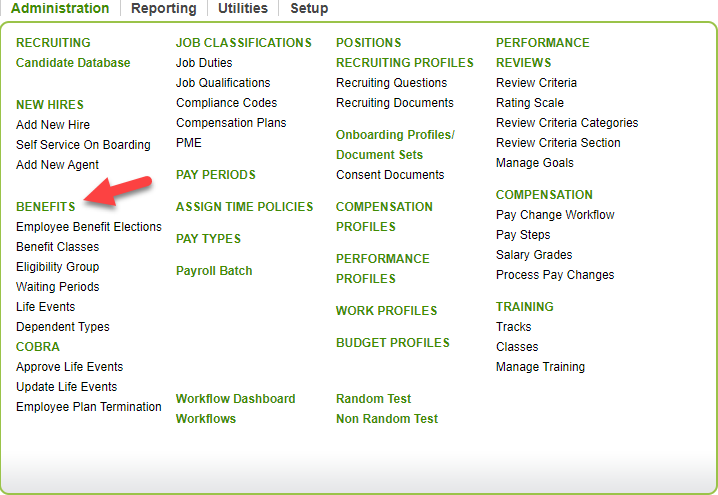
If you want to track benefits in CanopyWS, they must first be added to your company account. To view these, click on Benefits under the Administration tab.
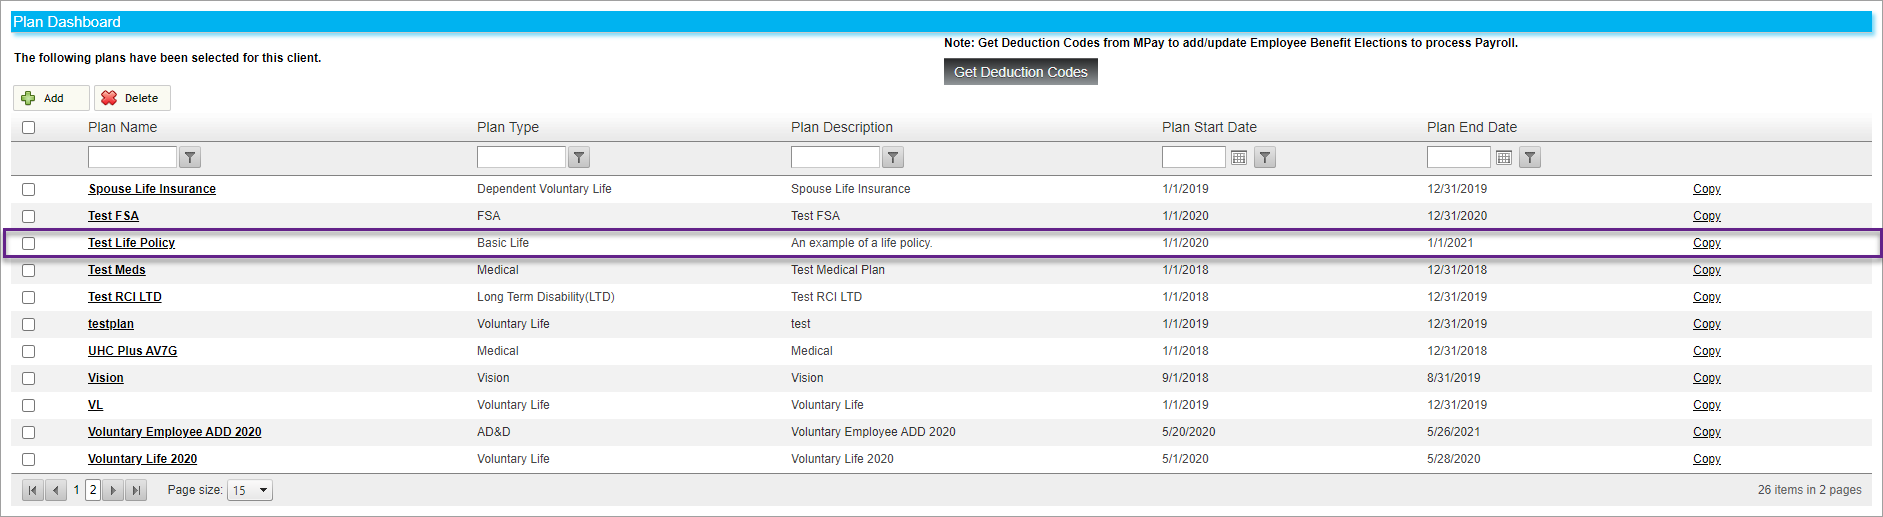
The resulting screen will display the benefits table. Typically, if you have imported history from another system into Canopy, these will be installed during your implementation.
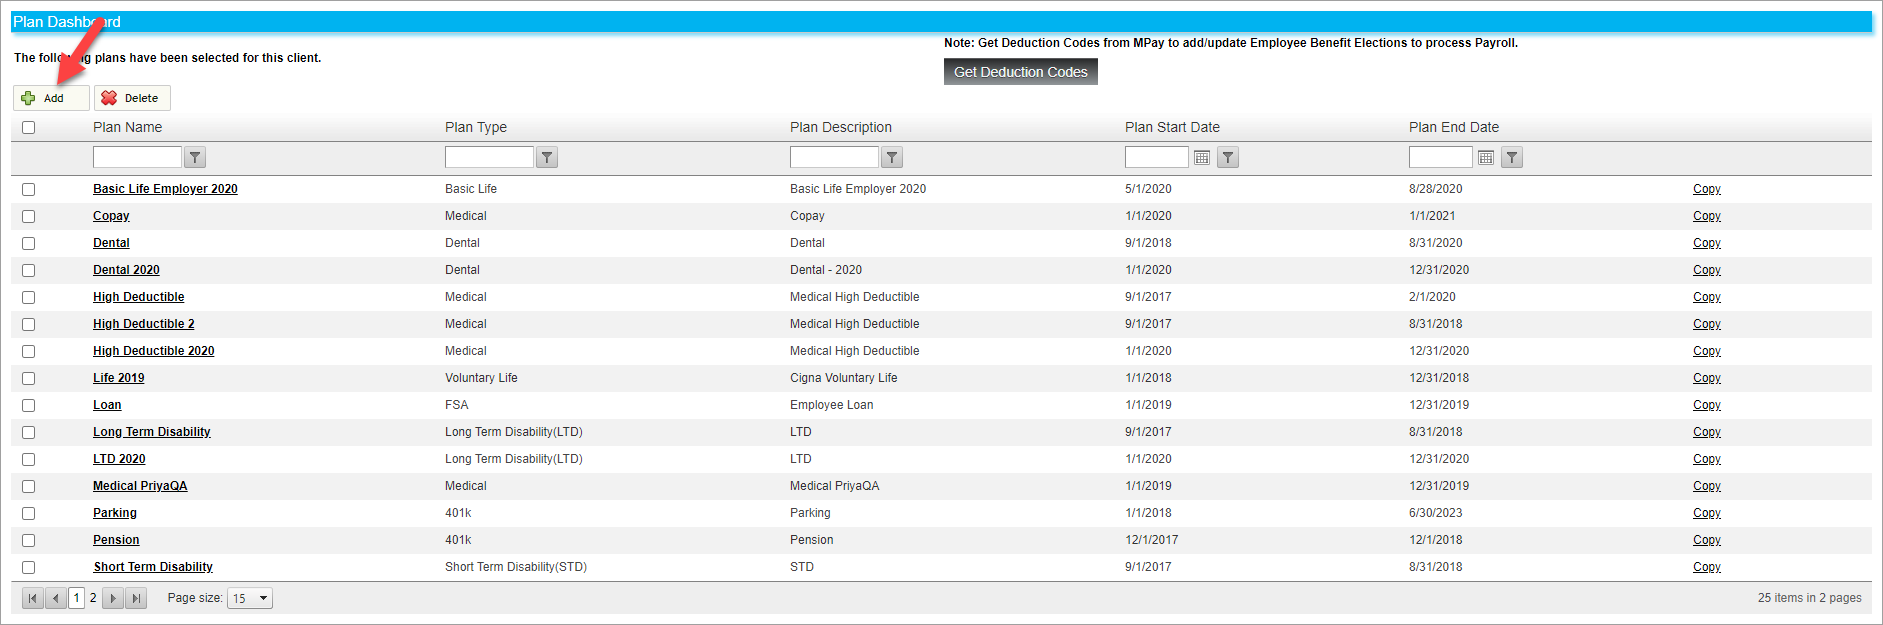
If you want to create a new benefit, click the Add button.
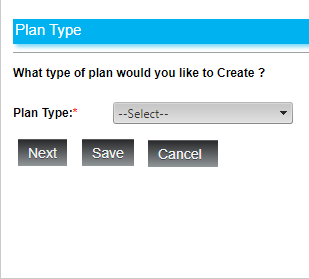
You will first need to select a plan type. There are multiple default types to choose from, and will determine certain fields in the next screens. In this example, I am going to select a life insurance policy to create.
Now you will need to include the necessary policy information. Here are some screenshots of each tab.
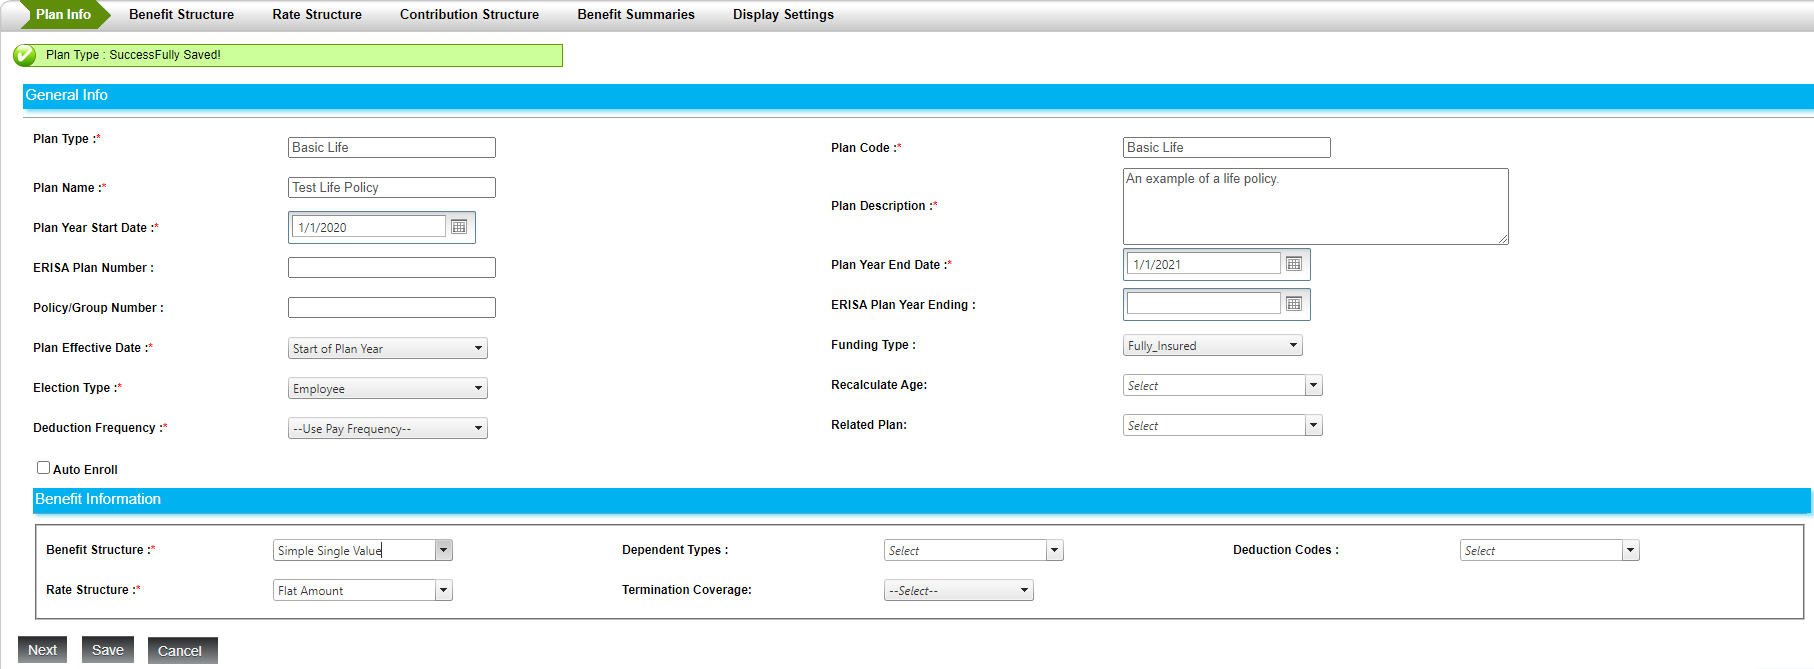
Plan Info
The type, start/end dates, and rate structures go here.
Benefit Structure
The benefit amount.

Rate Structure
The frequency and amount of policy rates.

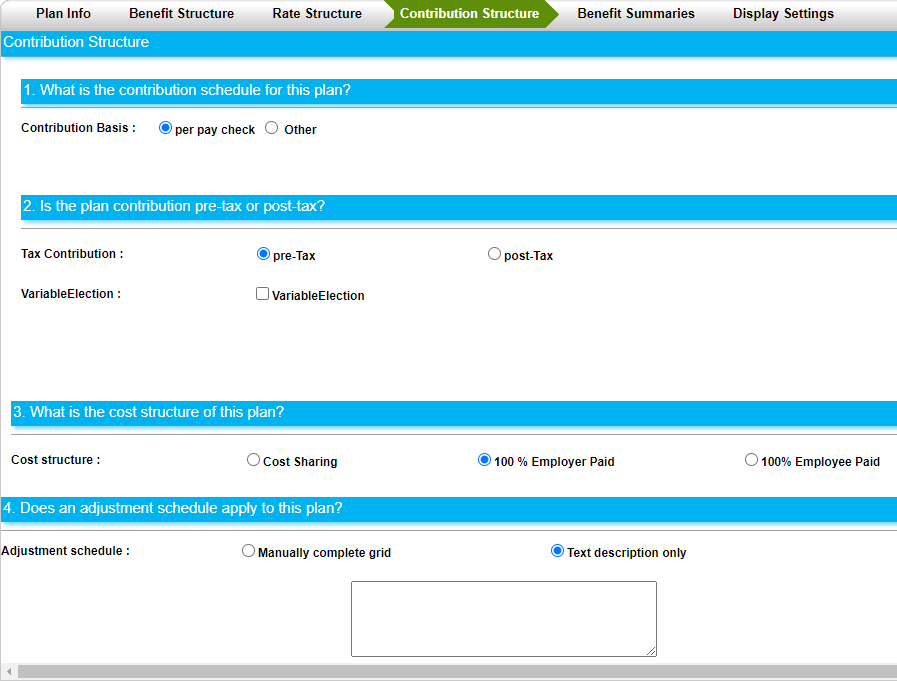
Contribution Structure
How the contribution is calculated.
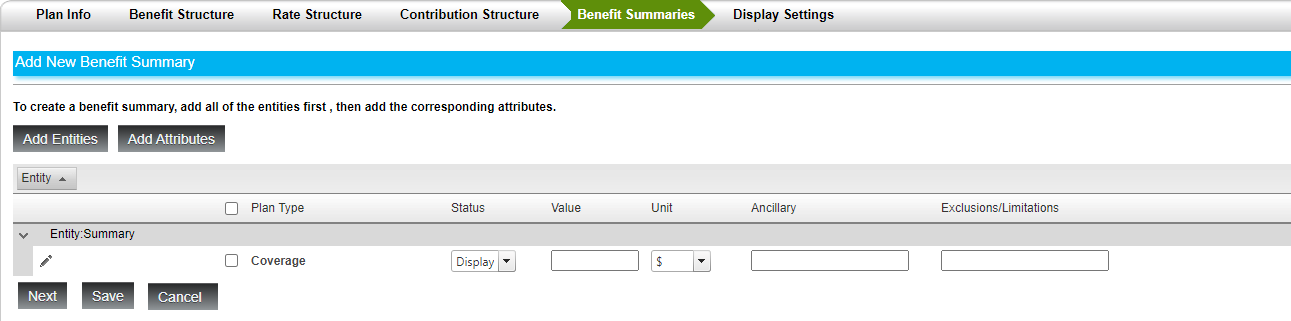
Benefit Summaries
If you want to create a display summary of this policy, it can be attached here.
Display Settings
Here you can attach a logo, extra text, and other visual displays.
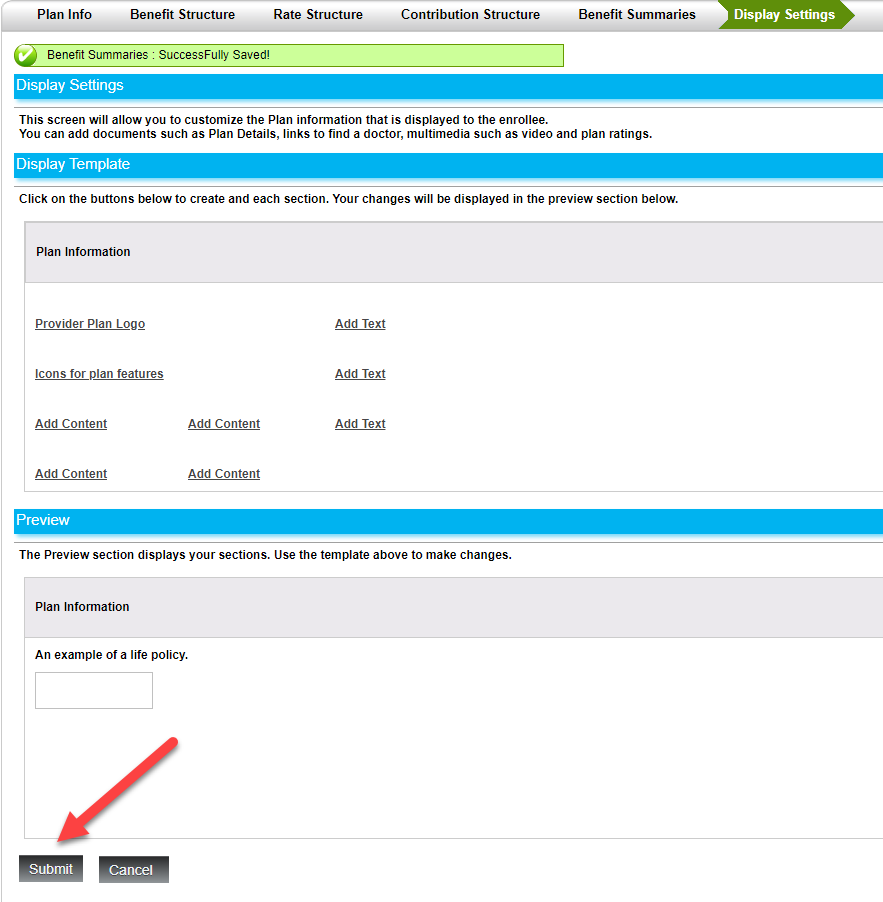
When you are finished editing this policy, click Submit.
The policy will now appear in the Benefits table.